Are you concerned about the security of your WordPress website? Do you want to restrict login access to only trusted IP addresses? Whitelisting IP addresses is an effective way to enhance the security of your WordPress login page. In this article, we’ll be taking a closer look at whitelisting within Shield Security PRO, exploring its dual applications:
- Whitelisting your entire site to ensure exclusive access for approved users.
- Whitelisting users from Shield Security Pro’s Bad Bot detection system to ensure that specific IP addresses are recognized as legitimate, reducing false positives and preventing these users from being blocked from the site.
While shielding against bad bots protects site access for legitimate users, full-site whitelisting takes security even further. Full-site whitelisting, set up through Shield Security PRO’s full-site lockdown feature, ensures that your site won’t load at all for non-whitelisted users. This is an intense security measure that may serve a vital role for businesses with strict security and access requirements.
We’ll walk you through the pros and cons of both whitelisting approaches and how to set them up, while helping you decide whether they’re necessary and practical for your business.
Let’s get started!
Understanding full-site IP whitelisting and its importance in WordPress security
Although it is too restrictive for public-facing platforms, full-site IP whitelisting is great for contexts where stringent access control is vital. Industries like finance, government, and healthcare, dealing with Sensitive Personal Information (SPI) or Private Personal Information (PPI), benefit from this heightened security. However, these are far from the only sites that can benefit from full-site whitelisting
For instance, although an eCommerce site catering to the public will find full-site IP whitelisting impractical, it could make sense for a wholesale retailer that only works with pre-approved buyers. It can also be useful for corporate intranets, which are limited to employee access only, or websites used to manage private security systems.
The decision to implement a full-site whitelist shouldn’t be taken lightly. Site owners must carefully weigh the pros and cons and remember that the extreme nature of IP whitelisting makes it fully incompatible for general public facing businesses and platforms.
Benefits and drawbacks of full-site whitelisting in WordPress
There are many benefits and drawbacks to full-site whitelisting that users should consider before setting this up on their site. For example, some benefits include that this gives you strict access control, ensuring that only approved users can interact with the site. It’s a highly effective security measure that can easily safeguard sensitive and confidential information.
It’s a great tool for building a secure environment that provides a safe and secure place for authorised individuals to access sensitive data. It’s a good way to balance security and accessibility when working with highly sensitive information, such as for financial transactions or healthcare.
One major drawback to consider, however, is that it’s time-consuming and resource-intensive to get a full-site whitelist set up. It also needs continuous attention and maintenance. It can be inconvenient for users, since it restricts them to a specific computer and location. There are workarounds like virtual machines, but they introduce additional complexities as well.
Lastly, no single measure, even whitelisting your whole site, is a foolproof solution against cyber attacks, as it does not provide complete protection. For example, you still have basic cybersecurity measures to keep in mind, such as the risks associated with remote workers logging in on shared family devices. However, the whitelisting itself can lull users into a false sense of security, which may lead to lapses in other vital security practices.
Step-by-Step guide to implementing full-site lockdown in WordPress
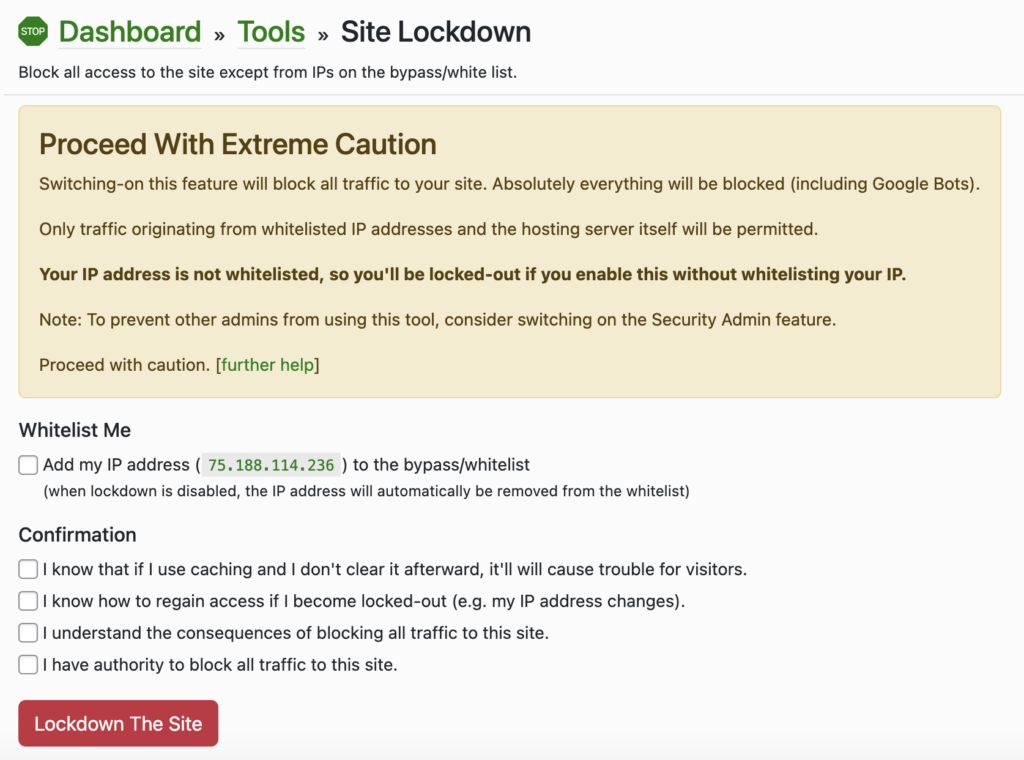
Shield Security PRO provides an advanced Site Lockdown feature that transforms your website into a whitelist-only accessible domain. When activated, this setting renders your site inaccessible to everyone except those IP addresses listed on your site’s bypass/whitelist list.
🚨Warning! Before enabling this feature, it’s crucial to add your own IP address to the bypass list to prevent locking yourself out.
Understanding the Site Lockdown Feature
In Shield Security PRO, the Site Lockdown feature simplifies the process of creating a whitelist-only site. It is also a useful solution to deploy during attacks, helping to limit access t the site until the situation can be fully assessed.
Shield Security Pro streamlines the process by doing all the heavy lifting for you, leaving little room for error. To enable the Site Lockdown feature, you need to:
- Access your WordPress dashboard.
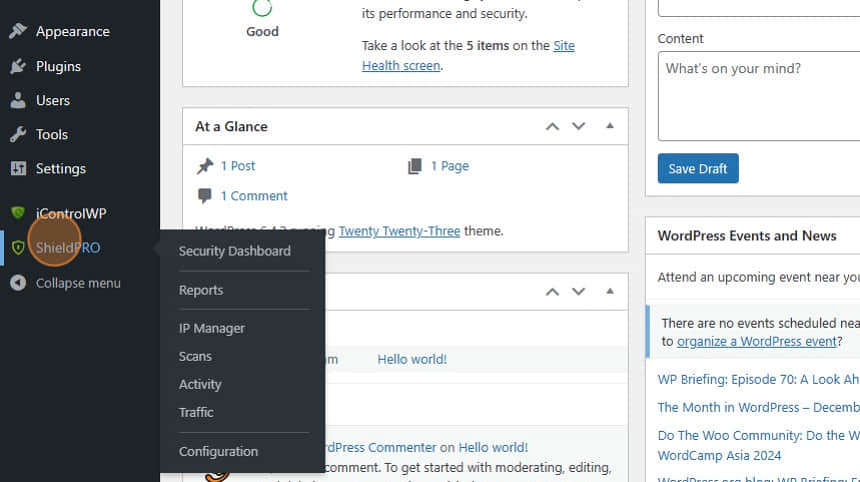
- Navigate to ShieldPRO from the left-hand menu.
- Go to Tools → Site Lockdown.
- Check the box to whitelist your own IP address, if you haven’t already done so. Do not skip this – otherwise you will be locked out of your own site.
- Review and confirm you understand the warnings and risks associated with this process.
- Select “Lockdown The Site”
With this setting turned on, your site will only be accessible to users you have whitelisted using Shield Security PRO IP bypass rules, referenced earlier in the article.
Although the Shield Security PRO Site Lockdown feature makes full-site whitelisting a breeze, you can alternatively restrict access to your website by supplying access rules within your .htaccess file (for Apache servers). This method is totally different from Shield Security PRO’s Lockdown capability and requires technical expertise. So, if you’re in any doubt, we recommend hiring a developer to help with the manual approach.
Here is how to manually restrict access to your WordPress site:
Use a plugin like UpdraftPlus or your hosting control panel to back up files and databases.
- Accessing the
.htaccessfile:
Connect to the server using an FTP client (like FileZilla) or through the hosting control panel.
Navigate to the root directory (usually public_html, www, htdocs, etc.).
- Modify the
.htaccessfile:
- Locate and download the
.htaccessfile. - Open it in a text editor.
- Add the following lines at the top to restrict access to specific IP addresses:
Order deny,allow |
📝Note on code: Replace xxx.xxx.xxx.xxx with the actual IP addresses.
If you are using Apache 2.4 or newer, it’s recommended to use the new Require directive for access control, which is more flexible and straightforward.
# whitelist Your First IP addressRequire ip xxx.xxx.xxx.xxx# whitelist Your Second IP addressRequire ip xxx.xxx.xxx.xxx |
📝Note on code: Replace xxx.xxx.xxx.xxx with the actual IP addresses. The Require directive is part of Apache’s authorisation features, allowing you to specify which users or systems can access your site.
- Once you have done this, the changes should be saved and uploaded again to the server (replacing the old
.htaccessfile).
Whitelisting IP addresses in the Shield Security PRO plugin
When using Shield Security PRO, safeguarding your website involves understanding and managing the ADE, which detects bad bot signals, defending your site from malicious entities.
However, this system, while effective, can occasionally result in false positives – legitimate users being mistakenly flagged as bots.
To prevent the accidental blocking of known users, you can whitelist IP addresses with Shield Security PRO. By adding these trusted users to the IP Bypass list, you ensure uninterrupted access while maintaining a robust defence against malicious bots. Here’s how to do this:
- Identify the IP address of the user you want to whitelist. Online tools, like Shield Security PRO’s IP address finder, can help users find this information.
- Go to your WordPress dashboard and select ShieldPRO from the left-hand menu to open the Shield Security PRO dashboard.
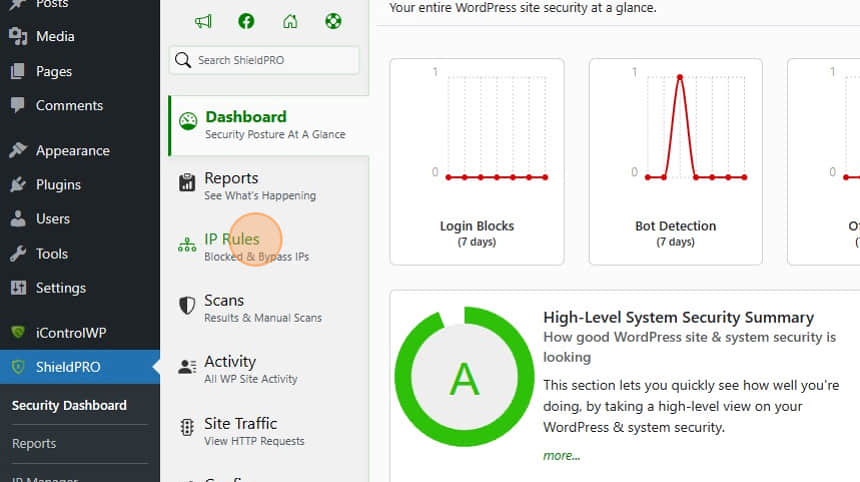
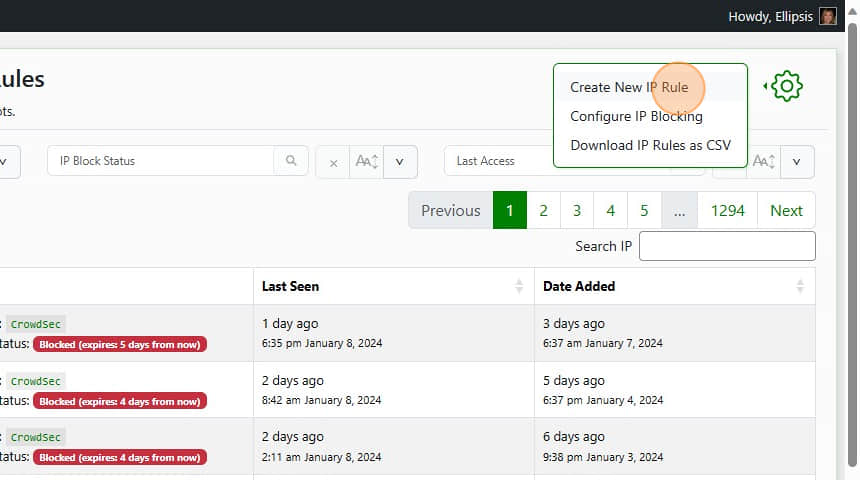
- Within Shield Security Pro’s dashboard, go to IP Rules and select the gear icon in the top right-hand corner.
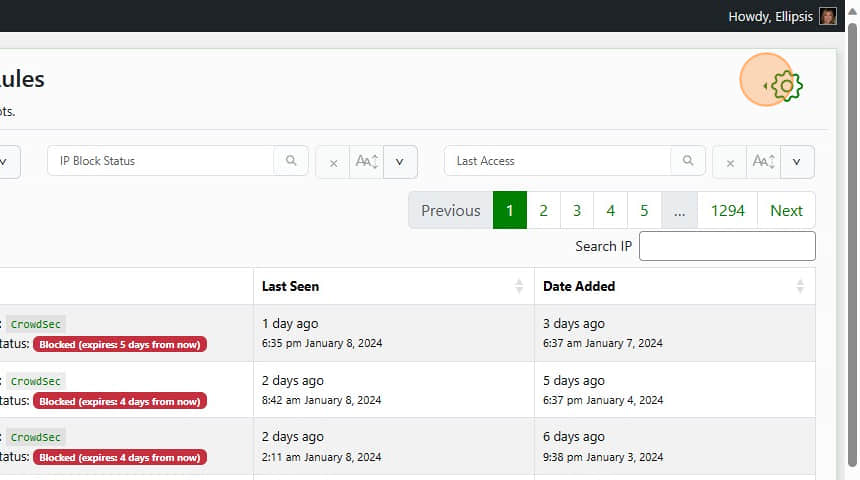
- Choose Create new IP rule to initiate the whitelisting process.
- Enter the IP address or range you want to whitelist.
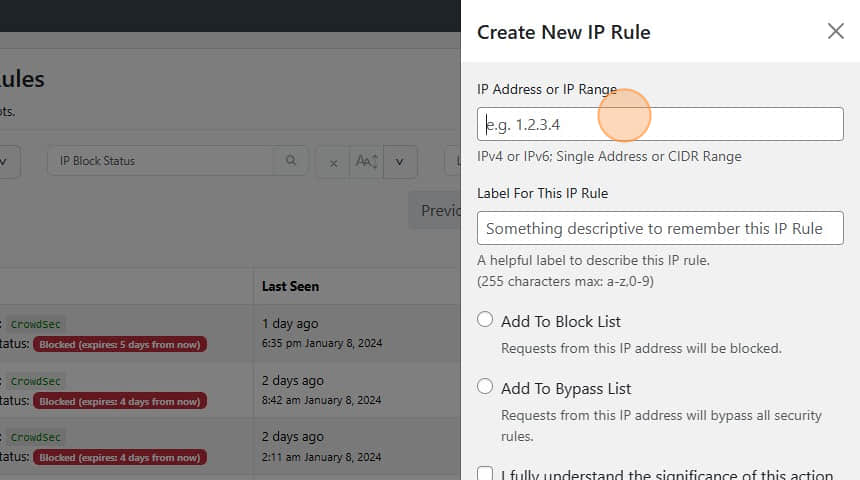
- Provide a clear and memorable label, such as “Whitelist”, for easy identification.
- Select Add to bypass list to confirm the whitelisting.
Once an IP address is whitelisted, the ADE will bypass it completely. However, exercising caution is important as this practice may pose security risks, particularly if the whitelisted IP address becomes compromised. It’s wise to periodically review your IP whitelists and remove any entries that are no longer required.
Maintaining your whitelist: Regular reviews and updates
One of the most important things to remember is that whitelisted addresses, once approved, are never blocked, regardless of their onsite activity.
Unlike Shield’s Automatic IP Blocking system which keeps your IP rules list lean for performance purposes, there is no automated pruning of whitelisted IP addresses.
The potential risks associated with outdated whitelist entries shouldn’t be overlooked.
Unauthorised access through excessive permissions could pose significant security threats. That’s why due diligence in the form of regular security audits are crucial to ensure authorised users retain the necessary access and unauthorised entities are promptly removed.
Here is our recommended approach to whitelist maintenance:
- Review: Periodically review the existing whitelist to identify any outdated or unnecessary entries. Always verify the legitimacy of each whitelisted IP address.
- Deleting out-of-date IPs: Always remove outdated entries promptly.
- Periodic checks: Conduct periodic checks, aligning with your usual website security audit schedule. Ensure that the whitelist aligns with the current needs of your website.
Shield Security Pro’s IP management and analysis features facilitate the whitelist maintenance process – allowing you to specify individual IPs, IP ranges, or removing addresses as needed.
Secure your WordPress site with Site Lockdown today
While Site Lockdown may not suit every website, it’s invaluable for security sensitive industries like finance, government, and healthcare, where stringent cybersecurity measures are vital.
IP whitelisting helps streamline access for some users, and it can be complex without a plugin to manage it for you, but Shield Security PRO simplifies the process.
Don’t compromise on cybersecurity. Download the Shield Security PRO plugin today for peace of mind and fortify your WordPress site!