Get Started Quickly With Shield
The Shield Security plugin for WordPress is huge. There’s lots of options and loads of features, and it could be a little overwhelming at first glance.
This guide will help walk you through the most important settings to get you started, so you’re getting the best protection from day 1.
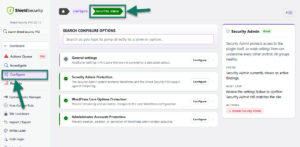
#1 Security Admin
Perhaps one of the most important features is the ability to prevent access to Shield’s settings by anyone except you (even other admins).
We call this the ‘Security Admin’ and it works by creating a password (PIN) that admins must supply in order to gain access and modify any Shield settings.
This is great protection against admins who aren’t familiar with Shield that may make mistakes with settings, and also against tampering of your security configuration.
See the quick intro video on Security Admin below.
Please note that the UI featured in the video demonstrating the Security Admin feature may differ from the current plugin interface due to updates and improvements made after the time of recording.
#2 Limit Logins and Brute Force Protection
Shield comes with some of the most powerful login protection you can get for free, or any price. You can block brute force login attacks and malicious use of your WordPress login and registration pages with just 1 option.
Discover the ways you can harden your WordPress login.
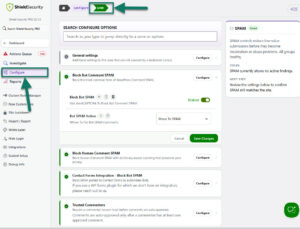
#3 Block 100% Comment SPAM
Much like the login protection, Shield can also block automated bot SPAM comments. It uses a sophisticated silentCAPTCHA AntiBot system on the comment form. This system uses Bot signals as a means of identifying automated bot spam – the most prevalent form of comment spam.
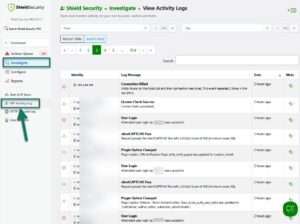
#4 Monitor Site Changes With WordPress Activity Log
When things go wrong, or changes occur on your WordPress site, you may want to know what caused it, who did it, and when it happened.
To help answer these questions, you have the WordPress Activity Log. It tracks both Shield events, and also major events on your site. In this way you know exactly what happened, and when.
From Shield v22, the WP Activity Log data is managed automatically. Shield stores important security and site events, links request details where available, and removes older records using retention tiers so the database does not grow indefinitely.
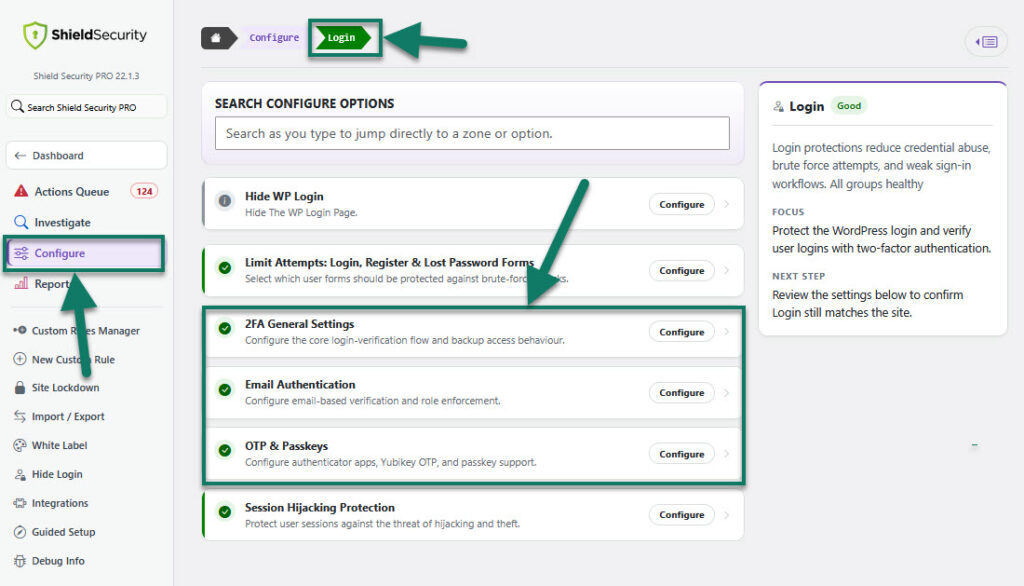
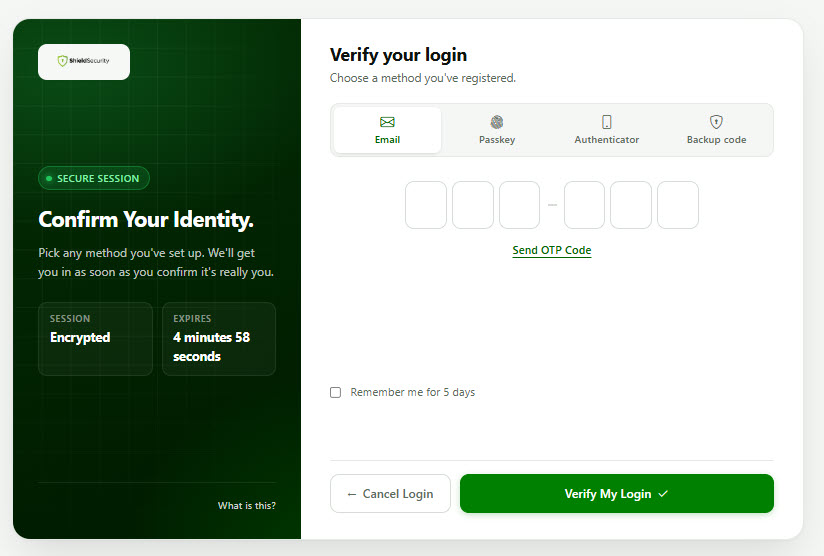
#5 Verify User Identity with Two-Factor Authentication (2FA)
2-Factor Authentication (2FA) is one of the most powerful ways to make sure your website users really are who they say they are.
With Shield Security you have 4 separate ways to use 2FA, and you can even use them in-combination for maximum protection:
- Email-based 2-factor authentication (including auto-login links)
- Google Authenticator
- Yubikeys (recommended)
- Passkeys/WebAuthn
- Backup Codes – to recover account in-case factor is unavailable
#6 Ensure Correct IP Address Detection
Shield is pretty good at automatically detecting the correct IP address of visitors. However, some webhosts aren’t configured in the best way and it can get a little messed-up.
To help Shield detect the address accurately and prevent any glitches, you can direct Shield to use a specific IP address source.
In order to perform this step, you’ll need to know what your current IP address is. You can find that out here.
Then you go to Configure > General > General Plugin Configuration > IP Source.
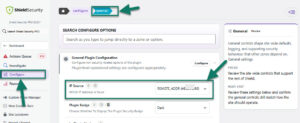
If you expand the description of the option you’ll see the list of all the visitor IP address “sources”. The most common and preferable option is REMOTE_ADDR.
Use the IP address you discovered above (when you clicked to view your IP address) to select the most appropriate option from the list.
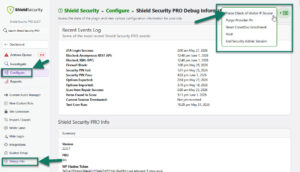
Alternatively, use the link through the additional actions menu under Configure > Debug Info page to forcefully check of visitor IP source.
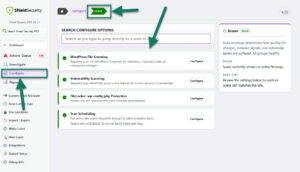
#7 Automatically Detect Malicious File Changes
Shield comes with a number of automated scans to help protect against hacks and file modifications going completely unnoticed.
The truth is, you can’t always prevent file system changes because they can come from many different directions that WordPress has no effect over (e.g. server compromise).
This is why automated scanning is so important.
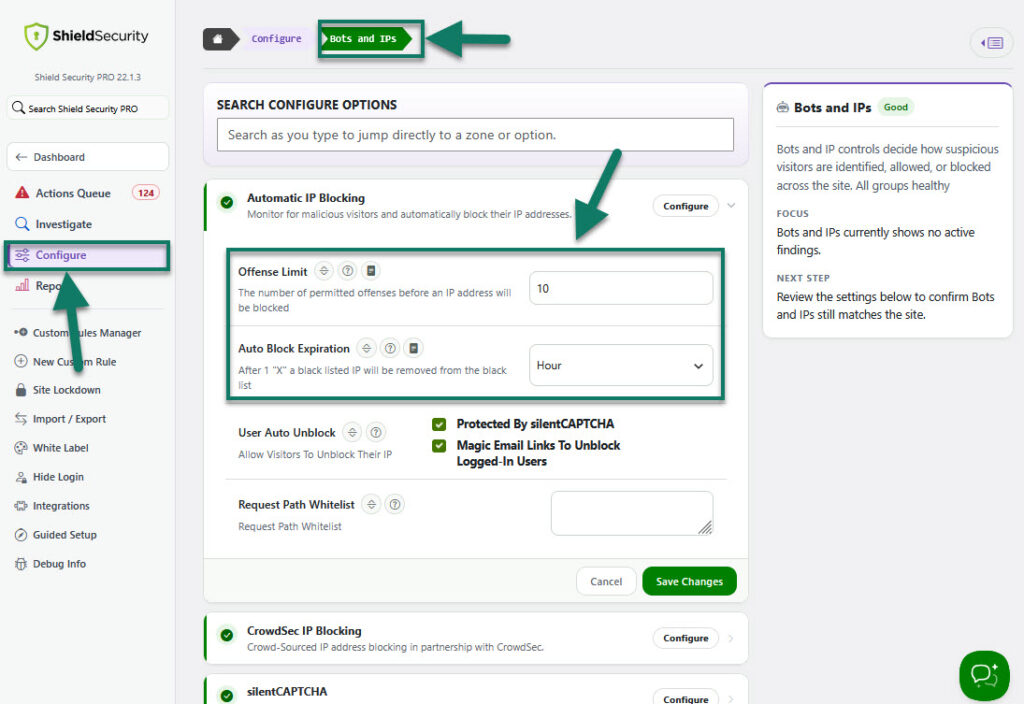
#8 Block Bad IP Addresses Automatically
Shield handles all aspects of IP blocking for you. You don’t need to maintain your own IP black list and it’ll automatically clean out old IPs so you don’t have a huge ballooning database of blocked IPs.
Shield will block IP address after that visitor has committed a certain number of offenses. The default is 10.
So if a bot tries to login 10 times and it fails, Shield will immediately block the IP from future attempts. You can set this limit to whatever you like, and you can control how long an IP address remains blacklisted.

What to do next?
We’re only scratching the surface here on what you can do with Shield.
We’ve made as many aspects of your security as configurable as possible. We want you have as much control over your site as we can provide, while keeping configuration and security straight forward and easy to use. There’s much more besides this, but this should help you get started.