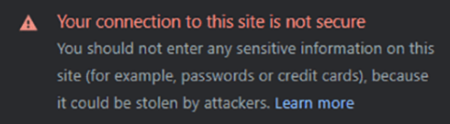
Imagine a scenario where a user visits your WordPress site, eager to make a purchase or sign up for a newsletter. The page loads, and they receive a message that your site is ‘not secure’.
Are they likely to stay and potentially compromise their personal or financial information? A study shows that 85% will click away and choose a competitor’s secure site instead.
If your website gives this message, it’s due to the lack of a Secure Sockets Layer (SSL) certificate. Adding an SSL is a simple process, and by doing so, you’ll remove the ‘not secure’ sign and stop scaring away potential customers.
In this article, we’ll detail a step-by-step guide to installing SSL certificates, with further tips on securing your site and building trust with your customers.
Understanding the ‘Not Secure’ warning on your WordPress site
SSL certificates validate your website’s identity and ensure a safe shopping experience for users by encrypting all traffic between them and your server. A missing SSL is usually due to the no certificate being installed, or the expiration of an existing certificate.
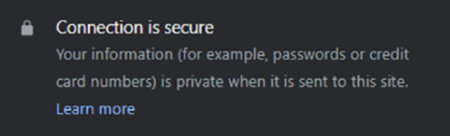
By keeping passwords, cookies, and payment details hidden from third parties, SSL certificates have enabled the web to become a much safer global marketplace. A secure site can be confirmed by clicking on the ‘site information’ link, found to the left of the URL address bar.
How important is website security?
Considering the potential costs involved, it’s vital that site owners make security a primary focus. Users never want their details compromised – a lack of consumer trust will affect your search engine rankings.
TLS/SSL Certificates are just one aspect of your site security. They provide encryption for your site visitors, but plugins such as Shield Security PRO are required to handle a myriad of threats that SSL certificates alone can’t fix. Shield provides protection from unauthorised access, spamming, and many other attacks to build a wall against hackers and enhance your business credibility.

But let’s get back to the importance of encryption for now. If you’ve faced a ‘not secure’ warning on your website, here’s what to do next.

Step-by-step guide to installing an SSL certificate
Installing an SSL certificate to your WordPress website may sound technical, but rest assured – it’s easy! Before installing a certificate, it’s useful to be aware of the options available.
Free and paid SSL options
Both choices deliver the same end result – encryption. The differences are found in validity periods and the number of checks made prior to having your certificate confirmed.
For many businesses, a free SSL certificate will suffice. Free versions provide Domain Validation (DV) – proof that you’re the owner of your site’s URL. You can obtain these via the likes of Let’s Encrypt and ZeroSSL, or directly through your hosting provider.
Check your hosting plan if you’re receiving a ‘not secure’ message, and consider switching your provider for a better deal.
Global businesses handling large sums of sensitive customer data may choose the paid route for added reassurance. Paid certificates can be purchased through the likes of Comodo SSL, Digicert, or Entrust.
Such providers take extra checks to validate business owners, including Organisation Validation (OV), and/or Extended Validation (EV). These require further steps, such as producing business registration documents. There’ll also be a longer period before expiration.
How to install an SSL certificate on your WordPress site
Once you’ve decided on your preferred certificate type, it’s installation time. If you’ve decided to go directly via your hosting provider, you can handle this through their custom installation process.
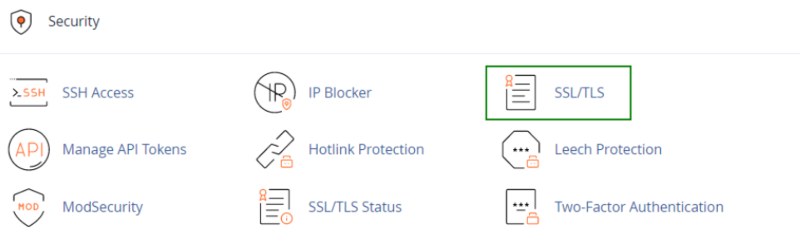
Otherwise, manual SSL Certificate installation requires some server level access that you typically won’t have with most web hosting providers. But they usually provide a control panel that allows you to get the job done indirectly. cPanel, for example, usually provides the tools you need to do it yourself, but it will all depend on how you host your website.
We recommend you first consult your host’s documentation or contact customer support to find the detailed steps, or you can also consult Namecheap’s resource on how to install SSL certificates.
How do I verify an SSL certificate?
Load your website in various browsers and check if the connection is secure. You can double-check this using dedicated online tools such as Qyalys SSL Labs and Digicert.
Look out for that secure-browser padlock symbol. Should it not appear, double-check the installation steps taken, or seek assistance from your SSL provider.
Once you’ve verified your certificate, you’ll be safe in the knowledge that your site traffic is encrypted. Congratulations! You’ve taken the first step on the road to having a secure website. There’s just a couple of other checks to ensure your site is running smoothly.
Redirecting your WordPress from HTTP to HTTPS
As a final step, you’ll need to migrate your site from its old non-secure HTTP protocol to secure HTTPS. You can do this through the following steps:
- Ensure your WordPress site has a backup.
- Through the WordPress dashboard, visit Settings>General. Find the fields marked WordPress Address (URL) and Site Address (URL). Change these from HTTP to HTTPS.
- Implement a site-wide 301 redirect through your .htaccess file or if you use CloudFlare you can have them automatically redirect HTTP traffic to HTTPS for you. Your hosting provider may also be able to manage this process for you.
Identifying and fixing mixed content issues
Mixed content issues can leave aspects of your site unencrypted and undo the hard work you’ve done so far.
An issue can occur when old code or CSS is using the older HTTP directive instead of HTTPS. This can result in a page or image not loading correctly and directly impact the user experience. Browsers may flag these up as warnings, resulting in more of those unwanted ‘not secure’ messages.
How do you find mixed content?
Conduct checks across your website by browsing as many pages as possible. Look out for any signs, such as a missing padlock or images that aren’t displaying as intended.
Your browser’s in-built developer tools can come in handy here. Right-click on your website, and select ‘Inspect’. Once the code appears on the right-hand side of your page, select ‘Console’, found at the top of the screen. Any mixed content should be highlighted below. Other online tools can be used to scan your site for mixed content, such as Why No Padlock?

How do you solve mixed content issues?
Once you’ve identified mixed content on your site, you’ll need to update any remaining HTTP links with HTTPS. If you happen to have found a host of these errors, don’t worry. What would be an intensive manual task can be automated through various plugins, such as the SSL Insecure Content Fixer.
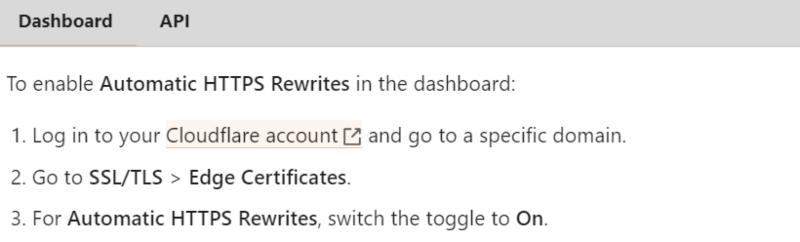
Cloudflare can also help your site’s HTTP to HTTPS migration by providing a tool for automatic HTTPS rewrites. This greatly reduces the likelihood that visitors will see “mixed content” errors.
Next up, it’s worth considering a few additional security measures, from a web-application firewall (WAF) to login and malware protection. Why take the risk of a breach, when the solution is so simple?
Enhancing WordPress security beyond SSL with Shield Security PRO
An SSL Certificate is a must for website security, but it’s worth taking time to assess your overall site protection to keep cyber-criminals out. The results of cybercrime are predicted to cost the world $9.5 trillion in 2024 alone, and nobody wants to be a part of that statistic.
From two-factor authentication to bad bot blocking, Shield Security PRO ensures web owners don’t have to worry about many security risks that WordPress sites will face.
We’ll take a look at some of the plugin’s key features below.
Prevent unauthorised access with Shield Security PRO features
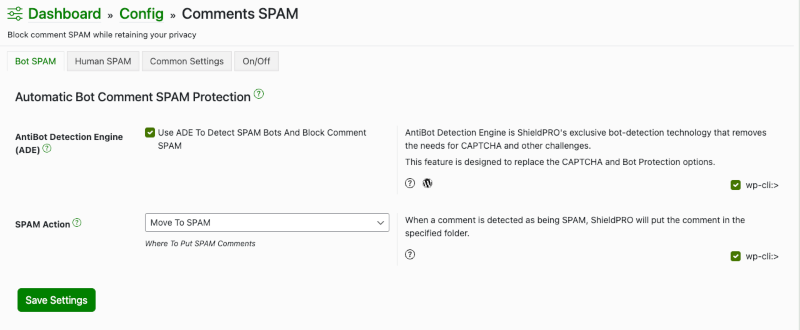
- Spam shield: Identifying and deleting spam comments can be time-consuming, and worse still, some spam serves as a basis for malware. Shield Security PRO stops comment spam on your WordPress website, ensuring only genuine user interactions remain.
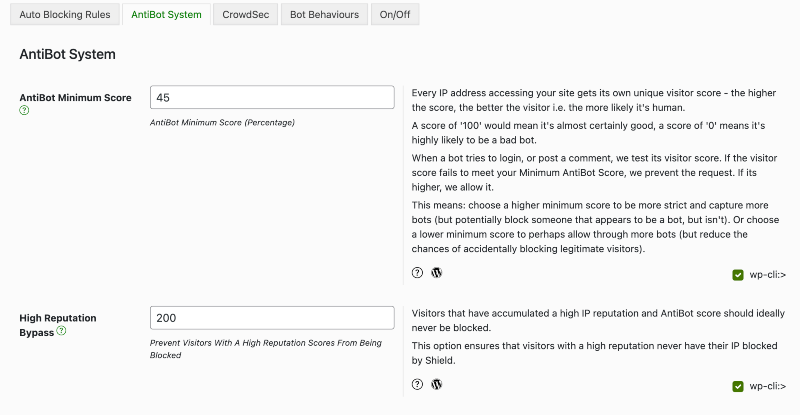
- AntiBot Detection and IP Blocking: Advanced algorithms filter out harmful bot traffic, reducing the risk posed by malicious visitors to your site. By blocking bad IPs quickly, it reduces their opportunity to attack your site.
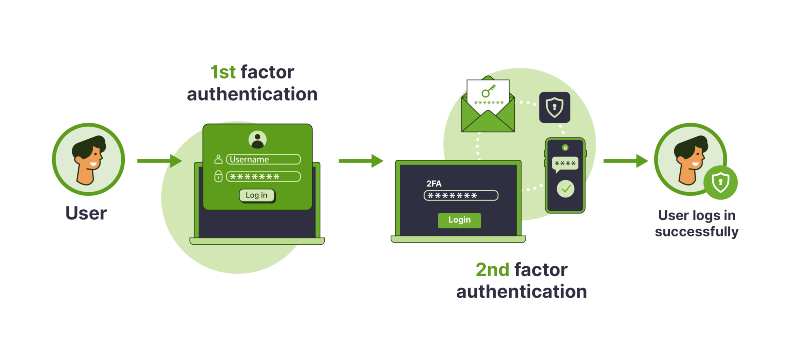
- Enhanced login security: Login security is vital for protecting personal or financial information on eCommerce sites or wherever sensitive details are stored. Shield Security PRO enforces strict password rules and two-factor authentication to protect user accounts.
- Web application firewall: Our web application firewall applies strict criteria to all website traffic, barring malicious activities from impacting your site.
With Shield Security PRO in your arsenal, all the complicated security tasks are done for you. The dashboard grades your overall security posture, and even keeps you up-to-date with your SSL certificate’s expiration date. A session-protection feature also allows you to log users out after a specified amount of time and guard against the risk of cookie hijacking when an open session can be taken over by a third party.
Shield Security PRO allows you to mould your defence protocols to fit your needs. Its comprehensive list of benefits is suitable for all website owners, from bloggers to digital agencies, eCommerce firms, and membership sites.
Next steps after securing your WordPress site
Lacking an SSL certificate can compromise your website’s security, and also harms the user experience. After all the hours you’ve spent on design, why run the risk of users leaving your site due to lack of trust?
Obtaining an SSL needn’t be intimidating, and web owners have access to many free and paid options. Add to this further measures, such as those offered by Shield Security PRO, and you’ll be able to close many loopholes that hackers will try to exploit on your website.
With an easy-to-use interface, protection against bad bot intrusion, a powerful firewall, effective spam blocking, and secure logins, Shield Security PRO is your go-to resource for end-to-end website security. Get started with Shield Security PRO today and enjoy all the benefits of a fortified site!