Every WordPress update patches holes that hackers are already poking at, fixes bugs that slow your site down, and keeps your plugins from turning into useless debris. Yet, plenty of people put them off, either because they don’t want to break something or because they assume everything’s fine.
Except it’s not fine. An outdated WordPress site is an open invitation for security breaches, sluggish performance, and compatibility issues that’ll eventually take your site down when you least expect it. And when that happens, it won’t be a quick fix – you’ll be scrambling to undo months (or years) of neglect.
We’re going to walk through why they’re necessary and how to update without wrecking your site!
Difference between major and minor WordPress updates
WordPress updates come in two flavours: major and minor.
Major updates (like moving from 6.3 to 6.4) introduce new features, redesign interfaces, and sometimes break things – especially if your plugins or themes aren’t ready for the changes. These are the updates that make people nervous, and for good reason. They require testing, backups, and sometimes a little troubleshooting.
Minor updates (like moving from 6.3.2 to 6.3.3), on the other hand, are all about security patches and bug fixes. They’re small, automatic, and designed to keep your site stable without disrupting anything.
By default, WordPress automatically applies minor updates, while major ones require manual approval. However, if you want to live dangerously (or just trust WordPress to handle it), you can also enable automatic major updates in the WordPress dashboard settings – just be ready for the occasional plugin meltdown.

Essential preparation before updating your WordPress site
Before kicking off the update process, lay some groundwork:
- Back up everything with a reliable tool like ShieldBACKUPS or UpdraftPlus. Save copies offsite in cloud or physical storage to ensure you can restore your site if something goes wrong. Don’t rely solely on your web host’s backups.
- Check plugin and theme compatibility by reviewing their changelogs and support forums. If a key plugin hasn’t been updated in months or has reports of issues with the latest WordPress version, hold off on updating until it’s confirmed stable.
- Use a staging site to test updates before applying them to your live site. Many web hosts offer one-click staging environments, but if yours doesn’t, set up a local test site with Local WP or XAMPP to avoid breaking your site in real-time.
Step-by-step: How to update WordPress
There’s more than one way to update WordPress, and the right method depends on your setup and comfort level. Whether you prefer the simplicity of the dashboard or the control of command-line tools, here’s how to update WordPress safely and efficiently.
Using the admin dashboard
Updating WordPress through the admin dashboard is the easiest route. Just go to Dashboard > Updates and you’ll see a message telling you if there’s a new version available.
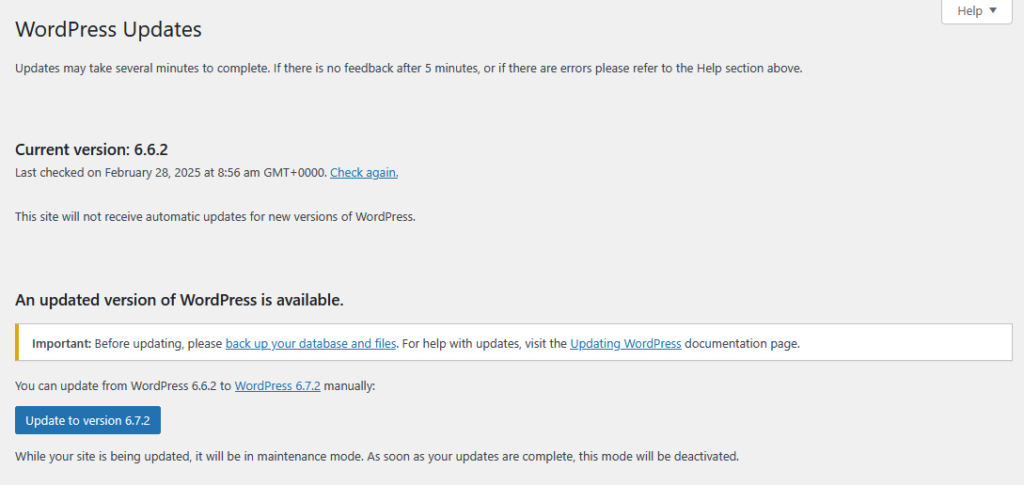
Click the button to update your version of WordPress and it should handle everything automatically. It should only take a few minutes and will always inform you on where you are in the process.
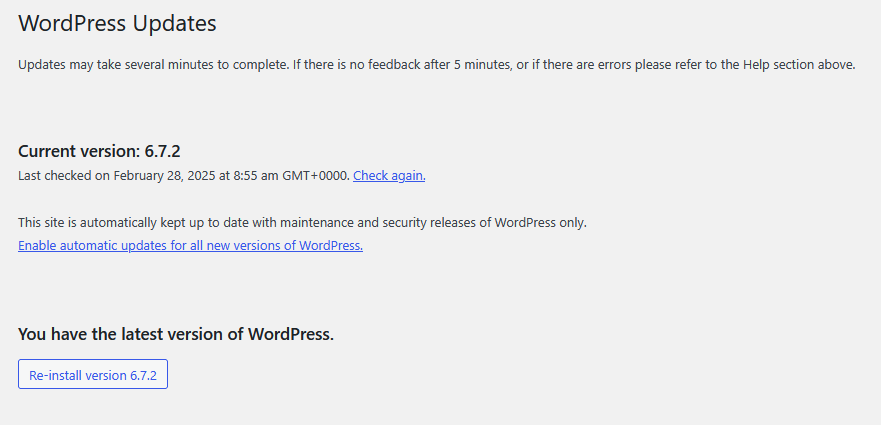
If everything goes right, you should have an updated version of WordPress running.
Using SFTP
If you’re unable to access your WordPress dashboard, you can go around it and update the actual site files manually. One way you can do this is through SFTP:
- Download the latest version of WordPress from the official website.
- Extract everything from the zip file you get.
- Get your SFTP credentials from your host. Contact support or read the documentation if you’re not sure where to look.
- Use these credentials to access your site using a client like FileZilla.
- Upload the wp-admin/ and wp-includes/ folders that you unzipped to your site to replace the ones you deleted.
- Visit your site to verify that it worked.
Using your hosting control panel
A lot of hosts, especially ones like Convesio who specialise in WordPress, let you update WordPress from your hosting dashboard in a few clicks. If you’re not sure how to do this, you can contact support or go through the docs.
If you can’t find the option or your host doesn’t provide WordPress-specific features, you can still update manually from your control panel’s file manager. This is an alternative to the SFTP method:
- Download and unzip the latest version of WordPress from the official site.
- From your hosting control panel, open the file manager.
- Open the folder where WordPress is installed. It should be public_html/ or www/.
- Delete only the wp-admin/ and wp-includes/ folders.
- Upload wp-admin/ and wp-includes/ folders from the archive you just unzipped.
- Open your website and check that it worked.
Using WP-CLI
This final method is the most technical, but it’s usually what works when nothing else does. Here’s how to update WordPress via WP-CLI:
- Access your site via SSH and your device’s terminal app.
- Check the current WordPress version:
wp core version
- Check for available updates:
wp core check-update
- Update to the latest version:
wp core update
- Check the version again using the first command to verify that it worked.
Troubleshoot and fix common update issues fast
Even with careful preparation, WordPress updates can go sideways. If your site crashes, acts strangely, or displays errors after an update, follow these steps to get it back on track.
- Clear your cache to rule out outdated files causing display or functionality issues. Clear your browser cache first, then purge any caching plugins or server-side caching through your web host.
- Deactivate all plugins if your site is broken or stuck in maintenance mode. Use the WordPress dashboard if possible, or rename the /wp-content/plugins/ folder via SFTP or cPanel to disable everything at once. Reactivate plugins one by one to find the culprit.
- Switch to a default theme like Twenty Twenty-Four to check if your theme is causing conflicts. Use the WordPress dashboard or rename your active theme folder via SFTP to force WordPress to fall back to a default.
- Enable debugging mode to see detailed error messages. Edit your wp-config.php file and set WP_DEBUG to true. Reload your site to view error messages that can point to the issue.
- Restore from a backup if troubleshooting isn’t working or your site is completely broken. Use your backup plugin to roll back to the last stable version, then investigate what went wrong before trying again.
- Use WP-CLI for recovery if you’re locked out of the dashboard. If your host supports WP-CLI, run commands to disable plugins, switch themes, or reinstall updates without relying on the web interface.
If none of these fix the problem, check your web host’s error logs or contact their support. Sometimes, a server-side issue might be blocking updates or causing conflicts.
Take control of your updates with Shield Security PRO
Ignoring WordPress updates leads to compatibility issues, sluggish performance, and security vulnerabilities that hackers love to exploit. But applying updates uncritically isn’t smart either.
Before hitting that update button, backup your site, check plugin compatibility, and test on a staging site to avoid downtime. If something breaks, troubleshoot by clearing caches, disabling plugins, switching themes, or rolling back to a stable version.
Even with the best update strategy, security gaps still exist. Shield Security PRO fills in these gaps by automatically blocking bot traffic, detecting vulnerabilities in real time, and enforcing critical security settings without slowing your site down.
Features like automatic malware scans, two-factor authentication, and vulnerability detection ensure your site stays protected between updates.WordPress updates keep your site healthy, but security isn’t just about staying current. Check out Shield Security PRO and find out how to stay ahead with an extra layer of defense!