A WordPress staging site is a copy of your live site where you can test new changes, plugins, or design tweaks without breaking anything.
Mistakes on your live site – broken features, slow load times, a weird bug – cost you. A staging site helps you avoid all that chaos. You get a safe space to try out fixes or experiment with new ideas, and only push them live once you’re sure everything works.
It’s straightforward, low-risk, and a no-brainer for anyone serious about leveling up their site. We’ll walk through why staging sites should be part of your workflow and how to set one up.
Step-by-step: Three methods to create a WordPress staging environment
As we’ve stated above, a staging site is just a cloned version of your live site that you can safely run tests on. To create one, you have three options: going through your host, using a plugin, or doing it manually.
Method 1: Using your hosting provider
A lot of hosting providers give you the ability to create a staging site in one click, and it’s usually the easiest method for doing so. The exact steps vary between hosts, so you should review their documentation or contact the support team.
We’re discussing a single-click process here, which you shouldn’t confuse with the more involved method of manually creating a copy of your site or moving between backups. Just make sure you’re specific when seeking this information from your host.
Method 2: Setting up staging with dedicated WordPress plugins
Alternatively, you can use a plugin to create a staging site. They work by cloning your site onto a subdomain or subdirectory; it’s all very straightforward.
Here’s how to do that using WP Staging:
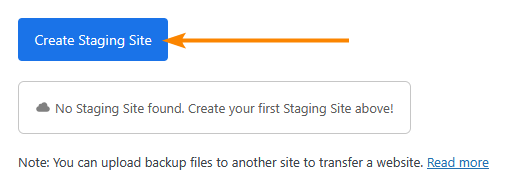
- From the admin dashboard, go to WP Staging > Staging Sites.
- Click Create Staging Site.
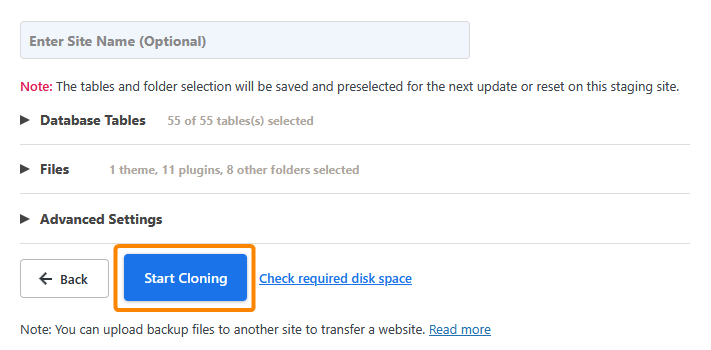
- Configure your staging site with a name and other settings as needed in the section that appears, then click Start Cloning when you’re ready.
- Wait for the setup to complete, after which you should see the popup below:
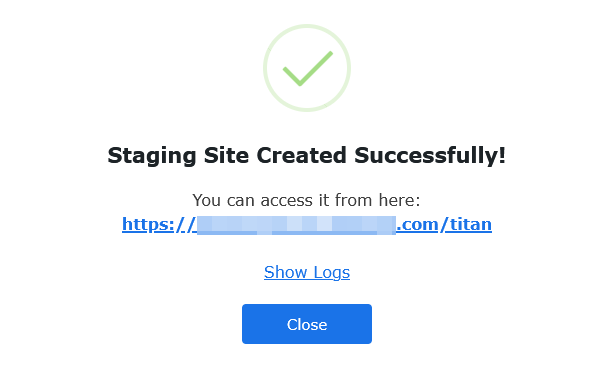
💡 If you hadn’t entered a name for your staging site when creating it, the plugin will automatically assign one. In the image above, it’s the name of the subdirectory.
- Click the link to access your new staging site.
Method 3: Creating a manual staging site
Here’s what you need to do to create a WordPress staging site manually:
- Create a subdomain for your staging site, such as staging.yoursite.com, through your hosting provider’s control panel (cPanel or similar).
- Copy all files from your live site to the staging subdomain’s directory. You can do this using SFTP, your host’s file manager, or SSH. Make sure to copy the entire WordPress directory, including wp-content, wp-config.php, and other core files.
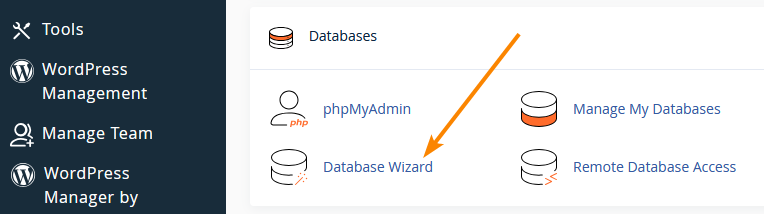
- In your hosting control panel, create a new database for the staging site. In cPanel, for example, this would be under Tools > Databases > Database Wizard.
- Create a new database user and assign it to the database with full privileges.
- Export your live site’s database from phpMyAdmin and import it into the new database for the staging site. You can do this in phpMyAdmin by selecting the live site’s database, clicking Export, and then importing the SQL file into the new staging database.
- Edit the wp-config.php file on the staging site and update the database credentials to match the new database you created for staging (DB_NAME, DB_USER, DB_PASSWORD, and DB_HOST).
- Update the site URL in the staging database. Open phpMyAdmin, go to the staging site’s database, and run the following SQL query:
UPDATE wp_options SET option_value = 'http://staging.yoursite.com' WHERE option_name = 'siteurl';
UPDATE wp_options SET option_value = 'http://staging.yoursite.com' WHERE option_name = 'home';
Visit the subdomain and verify that your staging site works. You can set up password protection to prevent both unauthorised access and search engines from indexing it.
How to safely migrate changes from staging to production

No matter how stable or functional things seem on your staging site, you should never push things to production without a backup of the live site.
When you’re satisfied with the changes you’ve made on your staging site, it’s time to push them to production.
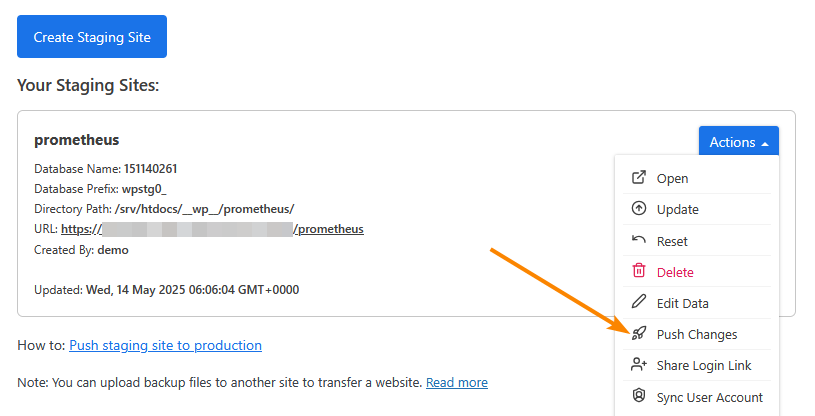
After creating a backup of the live site, you can launch the changes. If you created the staging site using your hosting control panel or a plugin, this is usually a one-click operation. For instance, on WP Staging Pro, you can click the Actions dropdown next to your staging site and select Push Changes.
To move a WordPress staging site to production manually:
- Back up both the staging and production sites, including the database and all files. You can do this manually, via your hosting control panel, or using a plugin like ShieldBACKUPS (part of ShieldPRO).
- Update the WordPress URLs to match the production domain in the settings. Use a plugin like Better Search Replace to replace any staging URLs with the production domain in the database.
- Transfer all WordPress files from the staging site to the production server using SFTP or a migration plugin.
- Move the database by exporting it from the staging site and importing it into the production server’s database through phpMyAdmin or WP CLI.
- Test the production site thoroughly to ensure everything works, such as links, images, and plugins. Deactivate caching and security plugins during the move, then reactivate them once complete.
- Point your domain to the production server if needed by updating the DNS settings with your domain registrar. Set the A record to the IP address of the production server so the domain directs to the production site.

Troubleshooting common WordPress staging site issues
If you’re having trouble after moving your staging site to production, here are a couple of things you could try:
- Check for URL mismatches as the staging site may still reference the old domain in its database. Use Better Search Replace to update all URLs, and resolve mixed content issues by switching all HTTP links to HTTPS and confirming SSL certificates are installed.
- Check for plugin conflicts as plugins may behave differently on production servers. Disable all plugins, then reactivate them one by one to identify any conflicts. If issues persist, try increasing PHP memory limits or execution time.
- Restore licences and configurations for plugins and themes if they didn’t transfer between environments. If you’d created targeted backups, you can roll back to them in the affected areas.
- Review file permissions, as incorrect settings can cause issues with uploads or plugins. Set directories to 755 and files to 644 to ensure proper access.
- Clear all caches, including browser, server, and CDN caches, to avoid outdated content being served. Purge your CDN cache if you use one.
Take your WordPress security to the next level with ShieldPRO
When moving between staging and production, security can’t be an afterthought. With just one additional licence, ShieldPRO can protect every stage of your WordPress site’s journey, from testing to launch.
- The plugin’s two-factor authentication ensures that only the right people can access your staging and production sites, giving you peace of mind during both development and deployment.
- IP allowlisting lets you restrict access to trusted sources, ideal for keeping your staging site safe while you work, without worrying about unauthorised users.
- Brute force protection kicks in to safeguard against login attempts, whether on the staging or live environment.
- Finally, unrecognised file detection alerts you to unexpected items so you can act before something slips through the cracks.
With ShieldPRO, security doesn’t stop at the final product. It extends through your development process. Check out ShieldPRO today and lock down your site at every step from staging to launch.