WordPress hardening is the process of implementing multiple layers of security to reduce your website’s vulnerability to attacks and unauthorised access.
While WordPress is maintained by a world-class security team, its massive popularity – powering over 43% of the internet – makes it an inevitable target. Most attacks aren’t personal. They’re often automated scripts roaming the web looking for low-hanging fruit, such as default configurations, outdated plugins, or weak credentials. WordPress hardening is about making your site an unattractive target by closing these predictable entry points.
This guide moves beyond basic advice like using a strong password – although that does help! We’ve compiled a comprehensive, prioritised checklist designed for site owners who want a proactive defence-in-depth strategy. Given that the importance of security is pretty clear, it’s now time to implement the specific technical measures that keep your site – and your users – safe.
If you want to understand the underlying threats before diving into the fixes, we recommend reading our deep dive on common WordPress security vulnerabilities.
WordPress hardening checklist
This checklist serves as your hardening roadmap. Below, we’ve categorised the most effective measures to employ. Use this section for a quick audit, then proceed to the detailed breakdown in the following sections for full guidance on overall implementation.
1. Authentication and access control
- Strong unique passwords: Ensure every user, regardless of role, uses a unique password of at least 12 characters.
- Two-Factor Authentication (2FA): Make 2FA mandatory for all accounts with ‘Editor’ or ‘Administrator’ privileges.
- Username security: Change the default ‘admin’ username and ensure user nicknames differ from login names to prevent username enumeration.
- Limit login attempts: Implement a lockout policy to block IP addresses after 3-5 failed attempts.
- Principle of Least Privilege (POLP): Avoid giving a user ‘Administrator’ access if ‘Contributor’ or ‘Author’ will suffice.
- Account hygiene: Conduct a monthly audit to remove unused or former employee accounts.
2. Updates and maintenance
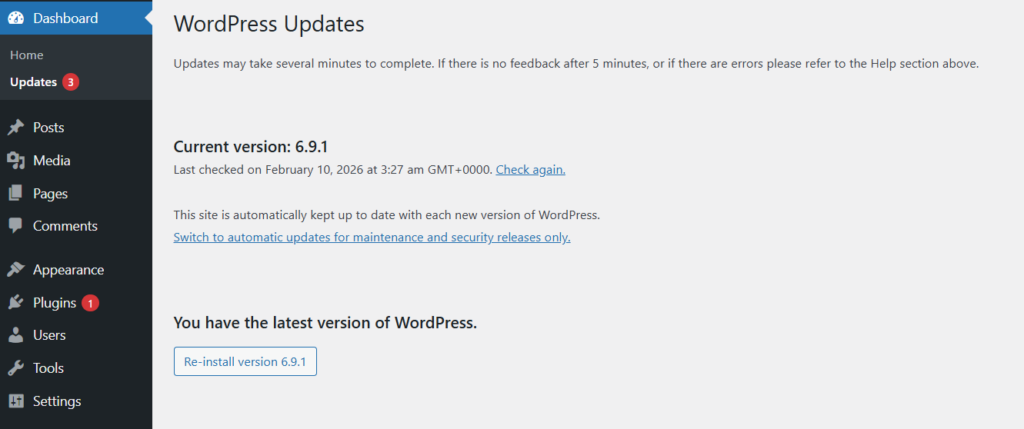
- Core software: Enable automatic updates for minor releases and update major versions.
- Plugin and theme hygiene: Audit your extensions on a regular basis.
- Clean-up: Delete unused plugins – deactivated plugins still contain code that can be exploited.
3. File and configuration hardening
- File permissions: Ensure your server enforces 755 for directories and 644 for files.
- Secure wp-config.php: Set permissions to 600 or 640 (depending on server/hosting requirements) and implement
.htaccessblocks to prevent direct browser access. - Disable file editing: Deactivate the built-in WordPress file editor to prevent one-click malware injection.
- Block PHP execution: Use server rules to stop PHP files from running in the
/uploads/folder. - Secure file transfer: Use SFTP (Secure FTP) exclusively to prevent password sniffing over the network.
4. Server and network hardening
- HTTPS/SSL: Ensure your site uses a valid SSL certificate and forces all traffic through HTTPS.
- Web Application Firewall (WAF): Use a firewall to filter out SQL injection and Cross-Site Scripting (XSS) attempts.
- Disable XML-RPC: Deactivate the xmlrpc.php file if you do not require the WordPress mobile app or Jetpack. If required, implement restrictions and rate limits.
- HTTP security headers: Implement headers like
Content-Security-Policy,HSTSandX-Frame-Optionsto protect your visitors’ browsers.
Protecting your WordPress login page
The login page is the most targeted URL on any WordPress site. Because the location is predictable (/wp-login.php), bots use brute-force techniques – essentially digital battering rams – to guess your credentials thousands of times per second. Hardening this page is the first and most critical step in preventing unauthorised access.
Limit login attempts and block bots
By default, WordPress allows an infinite number of login attempts. This is a massive security oversight. An attacker can theoretically try every password in a dictionary until they hit the right one.
To harden this, you must implement rate limiting. A standard policy is to block an IP address for 30 minutes after five failed attempts. If the IP continues to fail, the block should become permanent or significantly longer.
However, traditional CAPTCHAs (e.g. ‘Click all the squares with traffic lights’) are a poor user experience. Horrendous, even. They frustrate human users while sophisticated bots are increasingly able to bypass them.
Shield Security PRO solves this with silentCAPTCHA. Instead of visible puzzles, it uses a variety of signals – such as how long a user takes to fill out a form or whether they are interacting with the page like a human – to identify and block bots silently in the background. This keeps your login page secure without annoying your team.
Additionally, for a complete defensive layer, you should consider using a custom login URL to hide the entrance to your site entirely.
Implement Two-Factor Authentication (2FA)
Passwords alone are no longer sufficient for business-critical websites. 2FA adds a second layer of identity verification. Even if a hacker perfectly guesses your password, they are stopped cold because they don’t have access to your second factor.
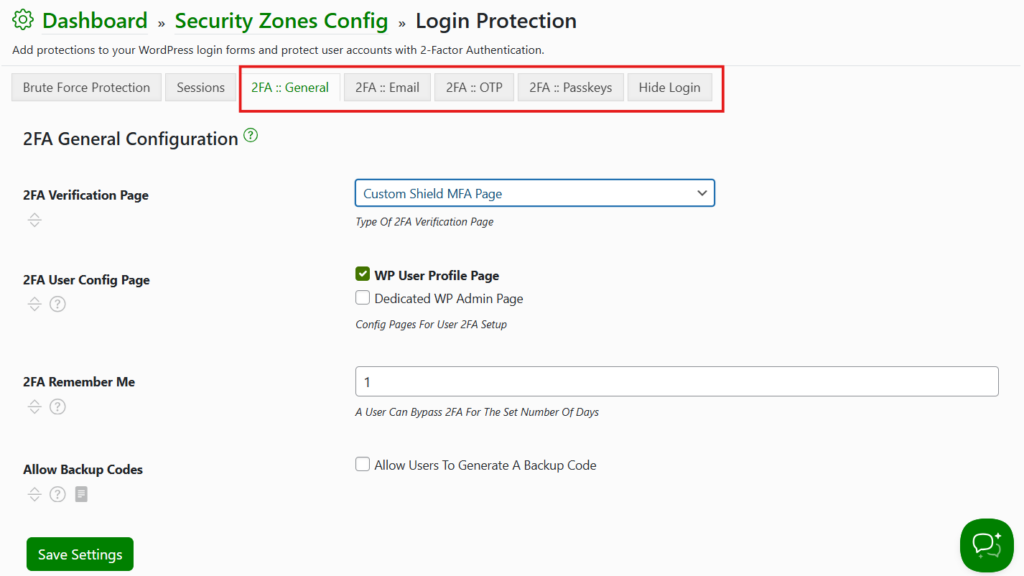
There are two primary methods you should consider:
- Email-based 2FA: The site sends a one-time code to your inbox. This is convenient but relies on your email account being secure.
- App-based (OTP): Use an app like Google Authenticator or Authy to generate a time-sensitive code. This is much more secure as it requires physical possession of your mobile device.
- Hardware keys: For maximum security, Shield Security PRO supports YubiKey, which requires a physical USB key to be plugged into the machine to authorise a login.
You should enforce 2FA for all users with the ‘Administrator’ role at an absolute minimum. To set this up, refer to our WordPress security plugin setup guide.
Password policies and session security
Hardening is as much about policy as it is about code. You should implement a password policy that:
- Prevents ‘pwned’ passwords: Shield Security PRO can check passwords against the ‘Have I Been Pwned’ API to ensure a user isn’t using a password that has already been leaked in a data breach.
- Enforces expiration: While controversial, forcing admins to change passwords every 90 days can mitigate the risk of long-term credential leaks.
Additionally, consider session hijacking protection. If an attacker manages to steal a session cookie from an admin, they can bypass the login page entirely. Hardening measures include locking the session to the user’s IP address. If the session is suddenly accessed from a different IP, Shield Security PRO will terminate it immediately, forcing re-authentication.

File permissions and wp-config.php security
Correct file permissions are the bedrock of WordPress hardening. In a standard hosting environment, multiple users interact with your files: you (the owner), the web server (usually Apache or nginx), and the public. If permissions are too loose, a vulnerability in one site on a shared server could allow a hacker to hop into your directory and modify your files.
Recommended file permissions: A technical deep dive
File permissions are represented by three-digit numbers. Each digit represents a different level of access: Owner, Group, and Public.
- 7 (Read, Write, Execute): Full control.
- 5 (Read, Execute): Can see and run files but not change them.
- 4 (Read only): Maximum restriction.
To harden your site, you must enforce the Principle of Least Privilege. This means giving the web server only the access it needs to display your site, and nothing more.
- Directories (750 or 755): These permissions allow WordPress to read and execute folders while limiting who can modify them. 755 is most common on managed hosts, letting the server run files securely without giving public write access.
- Files (640 or 644): These settings let WordPress read core files while preventing unauthorised users from editing them. 644 is standard for most environments, while 640 adds extra restriction when file ownership is properly configured.
- wp-config.php (400 or 440): This file contains your database credentials and security keys, so it should be tightly locked down. 400 or 440 makes it readable by the server but blocks access from everyone else, reducing the risk of leaks or exploits.
How to audit and modify permissions
You don’t need to be a developer to fix your permissions. Here are the three most common ways to secure your filesystem:
1. Via SFTP (recommended)
Connect to your site using an SFTP client like FileZilla or Cyberduck.
- For folders: Right-click your
public_html(or root) folder, select ‘File Attributes’, enter 755, and check the box ‘Recurse into subdirectories’ and ‘Apply to directories only’. - For files: Repeat the process, but enter 644 and select ‘Apply to files only’.
2. Via cPanel file manager
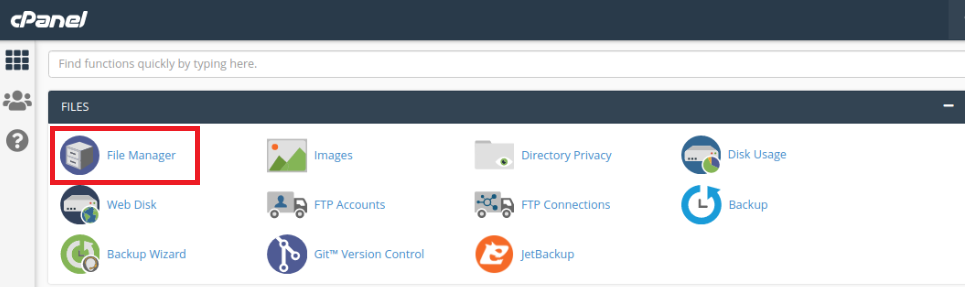
If you use a host with cPanel, open the File Manager. In the right-hand column, you will see a ‘Permissions’ numeric code. Click the number to open a dialogue box where you can toggle ‘Read’, ‘Write’, and ‘Execute’ for each user class.
3. Via SSH (command line)
For those comfortable with a terminal, you can correct your entire site’s permissions in seconds. Navigate to your WordPress root and run these two commands:
find . -type d -exec chmod 755 {} \; |
This ensures that every single directory is set to 755 and every single file is set to 644.
Securing wp-config.php: The ‘crown jewels’
The wp-config.php file is a high-value target because it holds your database username and password. If an attacker can read this file, they don’t even need to hack your WordPress dashboard – they can log directly into your database and steal your user data.
To harden this file:
- Move the file: WordPress is designed to look for
wp-config.phpin the root directory OR one directory above the root. If your site is in/public_html/, move the file to the parent folder. This makes it harder for a browser to ‘accidentally’ serve the file as plain text. Note that this is not a universal recommendation for all hosts/setups – some environments expect it to stay in the web root and rely on permissions/server rules. - Use .htaccess to block access: Even with correct permissions, you should add a ‘belt and braces’ layer. Add the following code to your
.htaccessfile to explicitly deny any web request for the file:
<files "wp-config.php">
Require all denied
</files>
- Regularly update security salts: Security salts are random variables that improve the encryption of information stored in user cookies. If you suspect a breach, you can generate new ones at the WordPress.org salt generator and paste them into your config file. It’s also advisable to do this when you need it as part of your wider security audit.
- Monitor changes with Shield Security PRO’s File Locker: This feature provides an extra layer of protection for
wp-config.phpand other files. It continuously monitors the file for any modifications, alerting you the moment a change is detected.
For more advanced .htaccess configurations, check out our guide tosecuring WordPress with .htaccess.
Disabling risky WordPress features
WordPress comes with several features enabled by default that prioritise convenience over security. On a hardened production site, these features act as unnecessary attack surfaces.
Block PHP execution in the uploads directory
Blocking PHP execution ensures that any script uploaded to the media folder cannot be run by the web server.
The /wp-content/uploads/ folder is designed for images, PDFs, and videos. It is one of the few folders that must be writable by the web server. Because of this, it’s a prime target for hackers who try to upload hidden PHP scripts.
If a hacker manages to get a file named malware.php into your uploads folder, they can run it simply by visiting yourdomain.com/wp-content/uploads/malware.php.
Hardening this involves telling the server: ‘Never execute PHP code inside the uploads folder’. Create a new .htaccess file inside /wp-content/uploads/ and add the following:
<FilesMatch "\.php$">
Require all denied
</FilesMatch>
Now, even if a malicious file is uploaded, the server will refuse to run it.
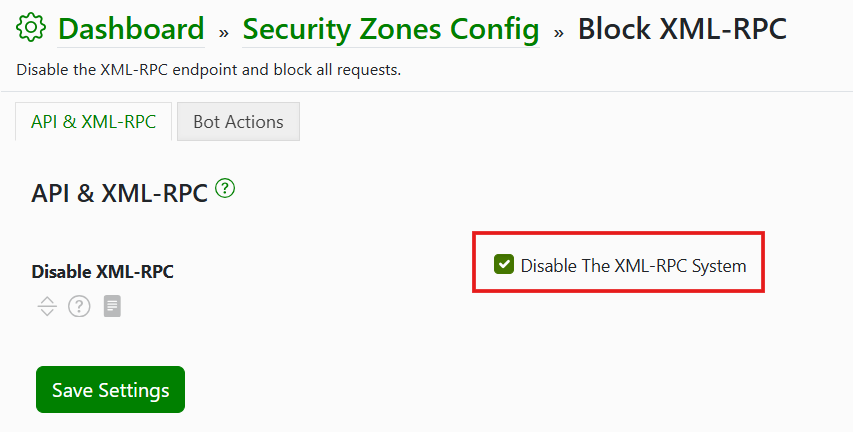
Disable XML-RPC: The legacy doorway
What is XML-RPC? XML-RPC is a remote communication protocol built into WordPress that allows external applications (like the WordPress mobile app or Jetpack) to talk to your site.
Why is it a risk? Most sites don’t use it, but hackers love it. It can be used for brute-force amplification. Instead of trying one password per login attempt, XML-RPC allows a hacker to try hundreds of passwords in a single request. It’s also a common vector for DDoS attacks.
The fix: If you don’t use the WordPress mobile app or Jetpack, disable XML-RPC. You can do this via .htaccess or within the Shield Security PRO dashboard – which is much, much easier, as you can see below!
Server-level hardening
Hardening doesn’t stop at the WordPress dashboard. Your server and the way you connect to it are equally important.
Use SFTP instead of FTP
SFTP (Secure File Transfer Protocol) is a completely different protocol from FTP that uses SSH (Secure Shell) to encrypt the connection.
- Standard FTP: Your username and password are sent across the internet in clear text. Anyone sitting on the same Wi-Fi network (like at a coffee shop) can steal your credentials.
- SFTP: Everything is encrypted. Even if someone intercepts the data, they see only gibberish.
Most modern hosts provide SFTP by default (port 22). Look for your SSH/SFTP credentials in your hosting panel and stop using port 21 (FTP) immediately.
Force HTTPS across your site
An SSL/TLS certificate is mandatory for hardening. It encrypts the data between your visitor’s browser and your server. However, simply having a certificate isn’t enough; you must force its use.
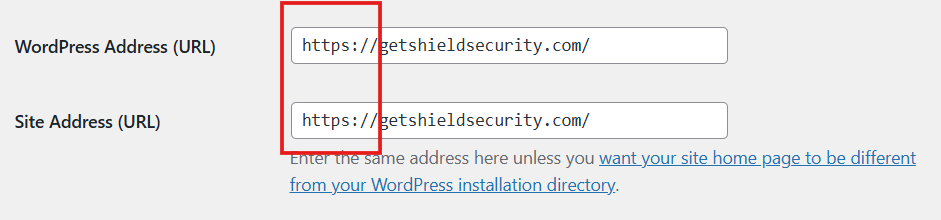
- Go to Settings > General and ensure both the WordPress address and site address start with https://.
- Add a redirect to your
.htaccessto ensure any visitor on http is automatically bumped to https. - Check for mixed content issues where images might still be loading via http.
For a step-by-step guide on this transition, see our article on setting up HTTPS on WordPress.
Implement a Web Application Firewall (WAF)
A WAF is a filter that sits in front of your site. It inspects every incoming request and compares it against a database of known attack patterns. If someone tries to send a SQL Injection string (a command designed to break your database) through a contact form, the WAF identifies the pattern and blocks the IP before the request even reaches WordPress.
Shield Security PRO includes a powerful, intelligent firewall that is pre-configured to block the most common WordPress-specific exploits, saving you from having to write complex server rules yourself.
HTTP security headers
HTTP security headers are a powerful but often overlooked component of WordPress hardening. These are instructions sent by your server to a visitor’s browser. They tell the browser how to behave when handling your site’s content, effectively turning the browser itself into a security tool that can prevent attacks like clickjacking and XSS.
Essential headers for a hardened site
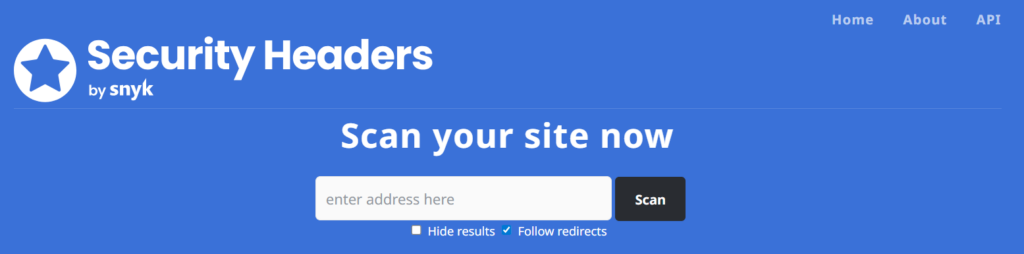
To achieve a high security grade (such as a Grade A on securityheaders.com), you should implement the following:
1. Content Security Policy (CSP)
This is the most complex but effective header. It tells the browser exactly which domains are ‘trusted’ to run scripts on your site. For example, you can tell the browser to only run scripts from your own domain and Google Analytics. This stops a hacker from injecting a script that steals credit card data, as the browser will refuse to execute it.
Caution: A misconfigured CSP can break your site by blocking legitimate scripts. Start in Report-Only mode if possible.
2. X-Frame-Options
This header prevents your site from being loaded inside an <iframe> on another domain. This prevents clickjacking, where an attacker overlays your site with an invisible layer to trick users into clicking buttons they didn’t intend to. Set this to SAMEORIGIN.
3. Strict-Transport-Security (HSTS)
HSTS tells the browser that your site should only be accessed via HTTPS. Even if a user types http://, the browser will automatically switch to https:// before the request is even sent. This prevents protocol downgrade attacks.
4. X-Content-Type-Options
Setting this to nosniff prevents the browser from trying to guess the MIME type of a file. This stops an attacker from disguising a malicious script as a harmless image file and tricking the browser into executing it.
Shield Security PRO simplifies this by providing a dedicated HTTP Headers module, allowing you to toggle these settings without manually editing your server’s .htaccess or nginx configuration files.
Using a security plugin for WordPress hardening
While manual hardening is essential, it is a static process. A security plugin provides dynamic defence. It monitors your site 24/7, reacts to threats in real-time, and consolidates hundreds of manual tasks into a single, manageable interface.
What to look for in a professional security plugin
Not all security plugins are created equal. When selecting one, prioritise these features:
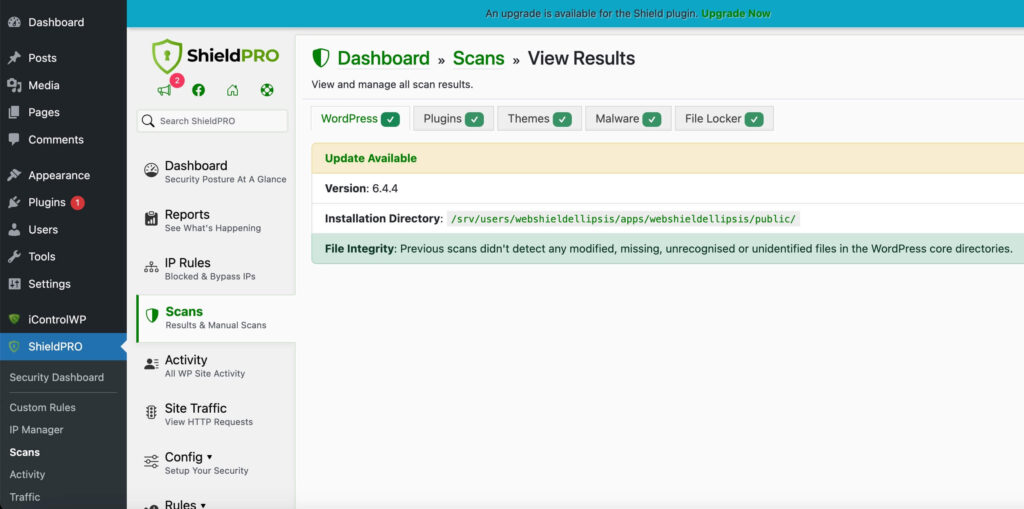
- File integrity monitoring: This alerts you if any core WordPress file is changed. Since core files should never change, this is a surefire way to detect a hack.
- Vulnerability scanning: The plugin should automatically check your themes and plugins against known vulnerability databases.
- Intelligent firewall: Look for a WAF that doesn’t just block IP addresses but analyzes the intent of the traffic.
- Bot detection: As discussed, look for frictionless solutions like silentCAPTCHA to keep the bad guys out – without slowing down the good guys.
The Shield Security PRO advantage
Shield Security PRO takes a prevention-first approach. While other plugins focus on cleaning up after a hack, our solution focuses on blocking the entry points in the first place.
- MAL{ai} malware scanner: Our AI-powered engine looks beyond known signatures – it analyses PHP code for malicious patterns, identifying zero-day threats that other scanners miss.
- Security admin: The security admin system is a unique feature that allows you to lock the plugin settings behind a separate PIN. Even if a hacker gains a full Administrator password for your WordPress site, they cannot disable your security plugin.
- CrowdSec integration: Shield Security PRO connects your site to a global network of threat intelligence. If an IP address is caught attacking a site in London, it’s automatically blocked from your site in New York before it even arrives.
If you are just getting started, follow our security plugin setup guide for a walkthrough of the optimal settings.
Backups and recovery: The ultimate safety net
The hard truth of cybersecurity is that no site is 100% unhackable. A UK government Cyber Security Breaches Survey found that 43% of businesses and 30% of charities reported a cyber security breach or attack over a 12 month period. Hardening is about reducing the probability of a breach, but you must always prepare for the possibility of one. This is where your backup and Disaster Recovery (DR) plan comes in.
Hardening your backup strategy
A simple export of your database once a month is not a backup strategy. A hardened strategy follows the 3-2-1 rule:
- 3 copies of your data: The live site plus two backups.
- 2 different formats: e.g. a cloud backup and a local server clone.
- 1 off-site location: Your backup should never be stored on the same server as your website. If the server is compromised or suffers a hardware failure, you lose both the site and the backup.
Test your restores
An untested backup is a gamble. At least once a quarter, you should attempt to restore your site to a staging environment. This ensures the data is not corrupted and that you know exactly how to get your business back online if the worst happens.
Shield Security PRO includes ShieldBACKUPS on the Plus plan and above. It provides automated, incremental, off-site backups that minimise resource use on your server while ensuring you have a reliable recovery point.
Secure your site with defence-in-depth
WordPress hardening is not a one-time task but a continuous commitment to the health of your digital presence. By moving through this checklist – from securing your login page to locking down your filesystem and implementing server-level headers – you create a defence-in-depth strategy that makes your site a difficult and unappealing target for hackers.
While manual hardening provides a solid foundation, the sheer speed of modern cyber threats requires an automated ally. Shield Security PRO consolidates these professional hardening measures into a simple, guided experience, allowing you to focus on your business while we focus on your perimeter.
Take the first step toward a hardened WordPress site today! Explore our full feature list or jump straight into securing your site with Shield Security PRO.
FAQ
Does changing the database prefix improve security?
Changing the default wp_ prefix to something like sh73_ is a common recommendation in older security guides. While it can prevent some very basic, automated SQL injection attacks that hard-code the wp_users table name, it provides very little benefit against a modern, targeted attack.
In effect, it’s security by obscurity. While it’s good practice for a new site, we do not recommend changing it on an existing site, as the risk of breaking your database usually outweighs the minor security gain.
How can I secure my WordPress site manually without using security plugins?
You can achieve a significant amount of hardening manually by:
- Enforcing correct file permissions via SFTP.
- Disabling file editing and
XML-RPCviawp-config.phpand.htaccess. - Implementing HTTP Security Headers in your server config.
- Setting up a server-level firewall (like ModSecurity).
Remember that manual hardening lacks file integrity monitoring and active bot blocking, which are essential for modern defence.
Which hardening measures might break my site?
Hardening is the process of restricting access, which can sometimes restrict legitimate functions:
- Permissions: If you set permissions too strictly (e.g., 444), WordPress may be unable to update its own core or plugins.
- XML-RPC: Disabling this will break the WordPress mobile app and some auto-posting social media tools.
- CSP headers: If you forget to allow a third-party script (like an embedded map or a chat widget), it will stop working immediately.
Pro tip: Always take a fresh backup before implementing a new hardening layer, and test the site in an incognito window immediately after.


One addition: even with hardening, if a breach does happen, Google can flag injected content. We always run a full content audit after any security event, using our own checklist for that process to catch hidden spam.