WordPress sets up new user accounts with a default username “admin” and a password chosen by the user during installation. Changing these default settings should be one of your first steps in securing your website. Left unchanged, these credentials can make your site an easier target for brute-force attacks.
Poor default login details are a common weak point in WordPress security. To protect your site, use complex, unique passwords and avoid predictable usernames like “admin”. Many users search for a default password when they lose access to their account. However, WordPress doesn’t have a universal default password. Instead, the platform offers several ways to recover account access.
This article will guide you through best practices for handling your WordPress credentials, including how to set them up correctly, and what to do if you lose access to your account.
Resetting the WordPress admin password
Losing access to your WordPress admin account happens more often than you’d think. Maybe you forgot your password or another admin changed it without telling you. Sometimes, it’s much worse – hackers might have got in and locked you out.
Security plugins are great, but sometimes they can be configured to be a bit overzealous. They might block you after a few wrong password attempts, even if you’re the legitimate account owner.
If you’re sure your password is right but you still can’t get in, someone might have hacked your site. They could have changed your login info to keep you out.
Don’t worry, though. This section will walk you through different ways to reset your WordPress admin password and get back into your site.
Method 1: Using the “Lost your password?” link
This method uses the standard “forgot password” function that you’ll find on many websites. It’s the most straightforward way to reset your WordPress password and should work for most users. Here’s how to do it:
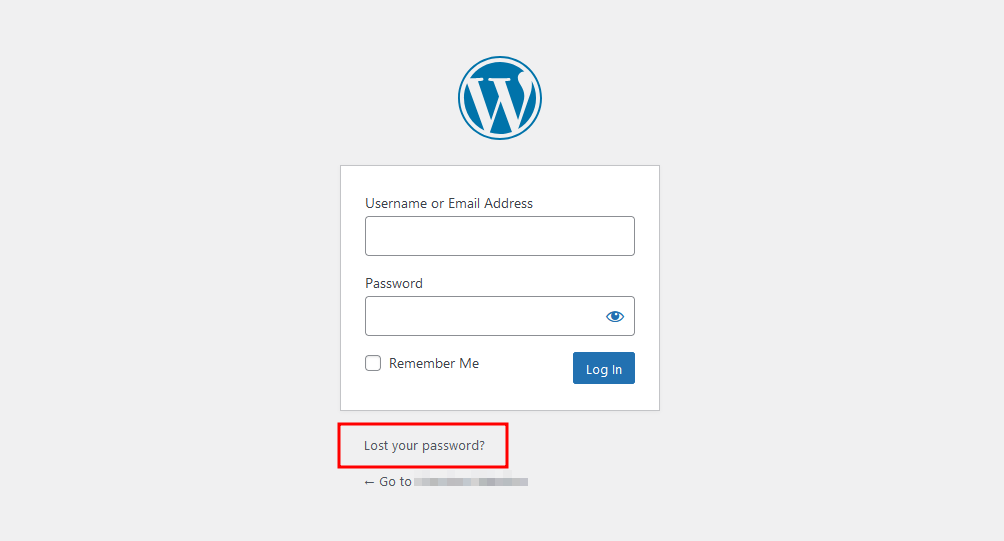
1. Navigate to your WordPress site’s login page.
2. Click on Lost your password?
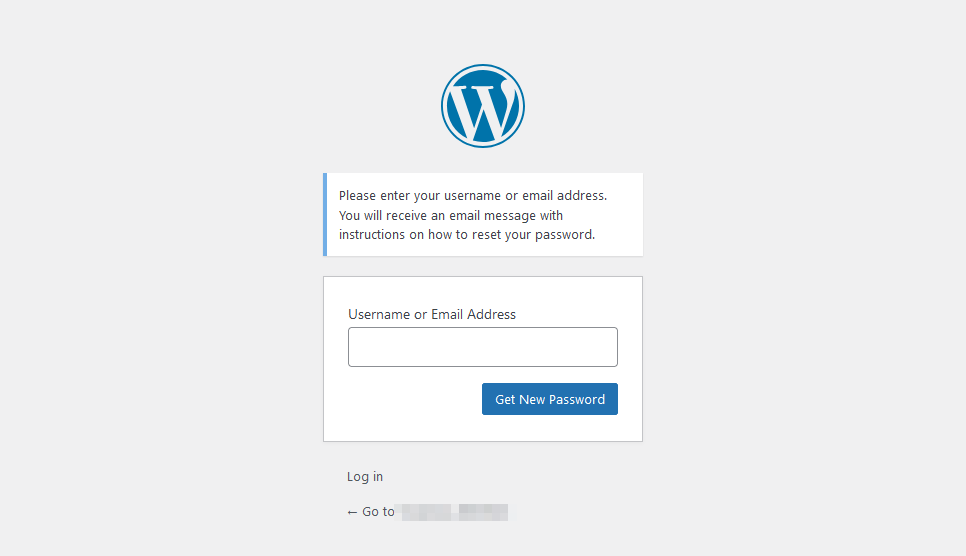
3. Enter the username or email address associated with your account and click on Get New Password.
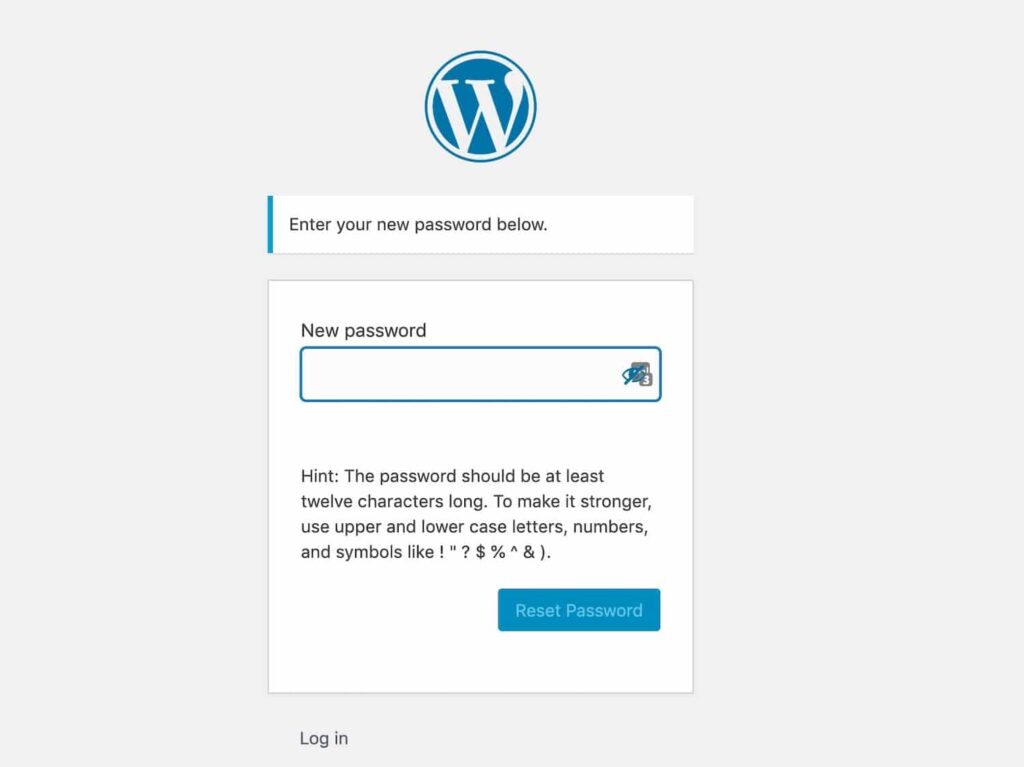
4. Check your email inbox for the password reset link.
5. Click on it and you should be taken to the screen below, where you can create a new password.
For websites using Shield Security PRO, you’ll have an extra layer of protection during this process. The plugin helps ensure that malicious actors don’t intercept password reset emails. It also offers Two-Factor Authentication (2FA), adding another security barrier even if someone manages to guess your password.
If this method doesn’t work, try the following:
- Double-check that you’re using the correct email address associated with the account.
- Check your spam folder and any other filtered folders. The reset email might have been filtered away by mistake.
- Look for signs that your email address may have been changed without your knowledge. WordPress sends a notification when an account’s email address is changed. If you see this kind of message and you didn’t initiate it, it’s a major red flag that your account might be compromised.
If you’ve tried these steps and still can’t access your account, you might need to reset your admin username and password manually. This involves a more technical approach using phpMyAdmin, which is covered next.

Method 2: Use WP-CLI
WP-CLI lets you interact with WordPress directly from a command line. To use it to change the default admin password, follow these steps:
- Reach out to your site’s host for your login details and use them to sign into your server through SSH. Use the default terminal apps on Linux and macOS or PowerShell on Windows.
- Change to the WordPress installation directory using
cd /path/to/your/wordpress - Get a list of users on the site using
wp user list. - The ID 1 corresponds to the admin. Change their password using the command below:
wp user update 1 —user_pass=the_new_password
Change the password again as soon as you’re back in to force WordPress to update it with a more secure hashing method.
Method 3: Using phpMyAdmin
phpMyAdmin is a web-based tool for managing MySQL databases. It’s commonly included in hosting control panels like cPanel and allows direct access to your WordPress database.
This method is for users who have access to their hosting control panel and are comfortable working with databases. It’s particularly useful when you can’t receive password reset emails or suspect your account has been compromised.
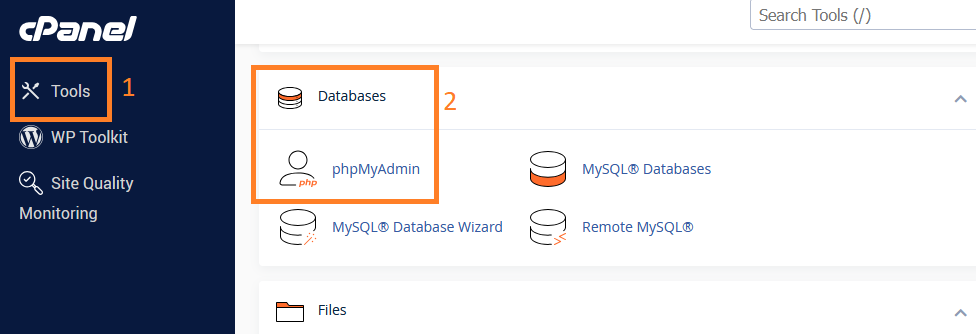
1. Open phpMyAdmin from your hosting control panel. It’s usually under Tools or Advanced, then Databases. For example, here’s where to find it in cPanel:
2. Select your WordPress database from the list of databases on the left.
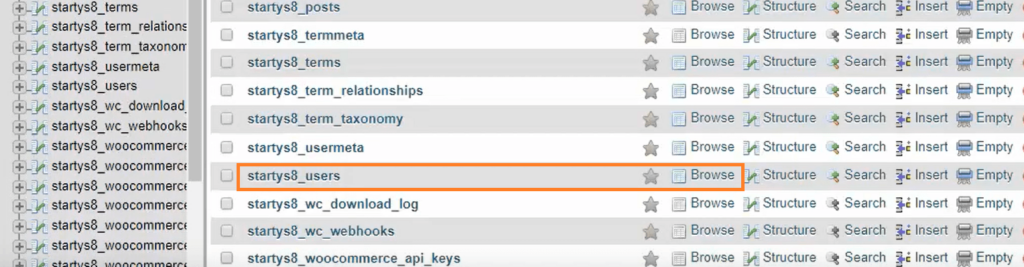
3. Locate wp_users in the column labelled Table and click on Browse. The prefix might have been changed to something other than wp for security purposes, but the suffix should be _users. For instance, the one in the example below uses the prefix startys8.
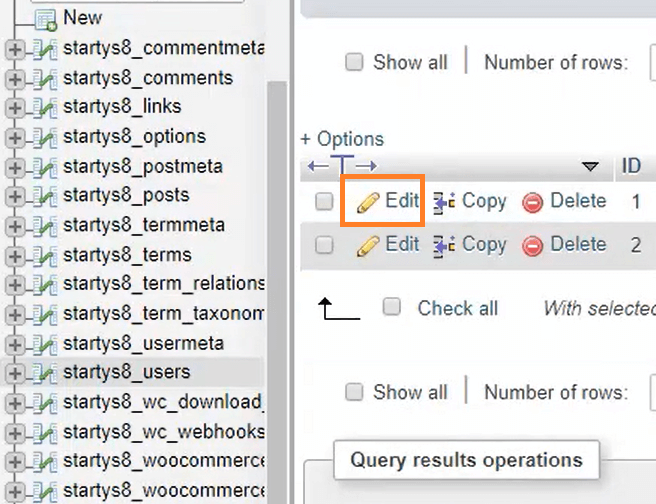
4. Click on Edit.
5. Find the field labelled user_pass and change the Value field to the new password and the Function to MD5.

6. Click on Go at the bottom of the page to save the changes.
This method directly modifies your database, so you need to be careful and follow each step precisely. If you’re unsure about any part of this process, it’s best to seek help from a WordPress professional or your hosting provider’s support team.
After this process, you’ll need to log in to your WordPress dashboard with your username and the new password you’ve just set. Once you’ve regained access, it’s good practice to change your password again through the WordPress interface, as this ensures the password is stored using WordPress’s current hashing method.
Method 4: Using FTP or SFTP
FTP (File Transfer Protocol) and SFTP (Secure File Transfer Protocol) are methods for accessing and managing files on your web server. This method is useful if you can’t access your site through phpMyAdmin or if you’re more comfortable working with files directly.
Before getting started, you’ll need the FTP credentials for your website, usually provided by your hosting company, and an FTP client like FileZilla. With these on hand, follow these steps:
- Connect and log into your website.
- Navigate into your WordPress root directory, usually public_html.
- Find the wp-login.php file. Save a copy locally as a backup.
- Download and open the original in a text editor.
- Near the top of the file, after the first
<?php, add the following code:wp_set_password( 'the_new_password', 1 );
💡 The number after the password, 1 in this case, is the user ID for the account whose password you’re changing. 1 is the ID for the admin, and you can find the other IDs in the wp_users table. - Upload the edited file to the site and log in using the new password.
- Remove the code from the edited file or upload the backup copy for security.
Method 5: Using the Emergency Password Reset script
If you can’t use any of the methods discussed so far, you can upload and execute a special PHP script on your site to reset the password. ⚠ Treat this as a last resort that you should never use unless you’ve exhausted every other option.
A few things you should be aware of before using this method:
- You need to know the admin’s username and email.
- The script updates the admin password and sends an email to the admin’s registered email.
- Even if you don’t receive an email, the password will still have been changed to the new one.
- Delete the file as soon as you regain access.
When you’re ready to get started, follow these steps:
- Create a new file called emergency.php in a text editor.
- Copy and paste the code from this page into the file.
- Save and upload the file to the root or public_html folder from your hosting control panel.
- Navigate to yoursite.com/emergency.php from your browser.
- Enter the admin username and a new password.
- Go to the usual WordPress login page and sign in using the admin username and new password.
- ⚠ Go back to the root folder and delete the emergency.php file.
Securing your site to avoid compromised credentials
Protecting your WordPress admin credentials is crucial in defending against cyber attacks. Hackers often target these login details to gain unauthorised access to your site.
Here are some effective strategies to safeguard your site against cyber attacks:
- Block malicious bots: Bots drive most cyber attacks. Shield Security PRO’s silentCAPTCHA technology identifies and blocks bad bots, preventing them from accessing your site. This stops most credential-based attacks before they begin. For example, a brute-force attack fails if the bot attempting to test millions of passwords is blocked initially.
- Implement 2FA: This adds an extra security layer beyond passwords. Shield Security PRO offers robust 2FA options to ensure only verified users can access your site.
- Use passkeys: These provide a more secure alternative to traditional passwords. Shield Security PRO supports various passkey implementations for enhanced security.
- Enable activity tracking: Monitor user actions on your site to spot suspicious activity early.
- Conduct regular malware scans: Routine scans help detect and remove any malicious code on your site.
- Train your team: Ensure all users understand security best practices, including recognizing phishing attempts and using strong, unique passwords.
- Keep WordPress core, themes, and plugins updated: Regular updates often include security patches for known vulnerabilities.
Keep site credentials safe with Shield Security PRO
Resetting WordPress admin passwords is sometimes necessary to regain website access. While the built-in reset link often suffices, manual methods through phpMyAdmin or FTP provide alternatives when standard approaches fail. However, the goal is to avoid these situations altogether.
Strong security practices significantly reduce the risk of losing access to your WordPress admin area. Using a comprehensive security plugin like Shield Security PRO is a key step in this process.
The plugin offers thorough protection, including bot blocking, two-factor authentication, and passkey support. These features work together to keep your site credentials safe and prevent unauthorised access attempts.
With Shield Security PRO, you’re not just reacting to security issues – you’re proactively preventing them. This approach saves time, reduces stress, and keeps your WordPress site running smoothly.
Get started with Shield Security PRO today and enjoy peace of mind knowing your admin credentials are protected by industry-leading security measures.