Encountering the dreaded “Cannot Modify Header Information” error can be a frustrating experience for any WordPress site owner. This cryptic message appears when something has gone awry within your site’s PHP code, disrupting its normal functionality and leaving you scrambling for a solution.
But don’t panic! While this error may seem daunting at first glance, understanding its causes and implementing the right fixes can quickly get your site back on track.
The short version is – this error occurs when PHP attempts to send HTTP headers after some output has already been sent to the browser. It can be caused by a variety of issues, from stray whitespace in your PHP files to conflicts with plugins or themes.
The result? Pages not loading correctly or essential features breaking down on your site. Naturally, addressing this error promptly is essential to maintain your site’s performance and user experience.
It’s worth noting that in some rare cases, this error can be caused by malware injections that add malicious code to your PHP files. If you suspect this may be the case, using a security plugin like Shield Security PRO can help you identify and remove the offending code quickly and easily.
In this article, we’ll provide you with a step-by-step guide to resolving the “Cannot Modify Header Information” error. We’ll explore common causes and their corresponding solutions, walk you through identifying the problematic code, and provide clear instructions for implementing fixes. Rest assured that fixing this issue yourself won’t require writing new PHP code from scratch – rather, you’ll be making targeted modifications to your existing files.
So, take a deep breath, and let’s dive in. With the right knowledge and tools at your disposal, you’ll be able to navigate the “Cannot Modify Header Information” error with confidence and get your WordPress site back to peak performance in no time!
What does the “Cannot modify header information: Headers already sent by” message mean?
The “Cannot modify header information: Headers already sent by” error means that something is preventing your site’s PHP files from executing as intended. To understand this error, it’s important to know what HTTP headers are in the context of this issue.
- HTTP headers are a crucial part of web communication, dictating browser behavior. They contain metadata about the HTTP request or response, such as the content type, cache settings, and redirects. In terms of site security, HTTP headers can be used to enforce content security policies, enable strict transport security, and prevent clickjacking, among other measures.
- PHP is a server-side scripting language that manages output (what your browser sees), including the aforementioned header information.
The error occurs specifically when PHP scripts attempt to send header information after the page output has already begun. To identify the source of the problem, you can use the full text of the error message. It will typically indicate the file and line number where the issue occurs, like this:
Cannot modify header information – headers already sent by (output started at /path/to/file.php:12)
In this example, the output began at line 12 in the file located at “/path/to/file.php”. Once you recognize what the different parts of the error message mean, you can pinpoint where to look for the problem.
When reviewing the PHP file in question, keep an eye out for common issues such as:
- Spaces before <?php> or after ?>
- HTML blocks before the PHP header function
- Coding issues with a specific plugin
How does this error message impact your site?
Leaving the ‘Cannot modify header information’ error unaddressed can lead to a slew of adverse effects that extend beyond mere inconvenience.
Firstly, the error manifests as a disruption in site functionality, with critical operations like redirections and cookie settings failing to execute as intended. This not only impedes user navigation but also undermines the overall browsing experience.
Secondly, if these errors persist, they can inflict lasting damage on your website’s visibility and ranking. Search engine algorithms prioritize user experience, and websites plagued by recurring errors risk being relegated to lower search result positions or even deindexed altogether.
Thirdly, these errors can cast a shadow on your business’s professionalism and trustworthiness. In an era where online credibility is of utmost importance, a website plagued by technical glitches undermines customer confidence and detracts from your brand’s integrity. Visitors may perceive such errors as a mark of lax security or poor maintenance standards, eroding trust and potentially driving them to competitors. As you can see, the long-term ramifications of this problem extend beyond immediate performance issues, encroaching upon the very foundation of your business.
How to fix the problem?
There are several methods to resolve the “Cannot modify header information” error. These include:
- Editing your site’s theme files.
- Using an FTP/SFTP client to access and modify the problematic code directly.
- Employing a security plugin like Shield Security PRO to detect and remove any potential malware that might be causing this issue.
In the following sections, we’ll provide more detailed instructions for each of these methods, so you can choose the approach that best suits your comfort level and technical expertise.
Important note: Before we dive into the specifics, it’s crucial to back up your WordPress site prior to making any changes to the code. This safeguards your data in case something goes wrong during the troubleshooting process. Follow current best practices for backing up WordPress sites to ensure you have a reliable restore point.

Editing the Site Theme
Editing the site theme via the WordPress theme editor offers a straightforward approach to rectifying the ‘Cannot modify header information’ error for users comfortable with code manipulation. Accessing the WordPress theme editor is a relatively simple process:
- Log in to your WordPress website’s admin dashboard using your credentials.
- Proceed to the Appearance tab located on the left-hand sidebar.
- Within the Appearance menu, select the Theme File Editor option. This will open the WordPress theme editor interface.
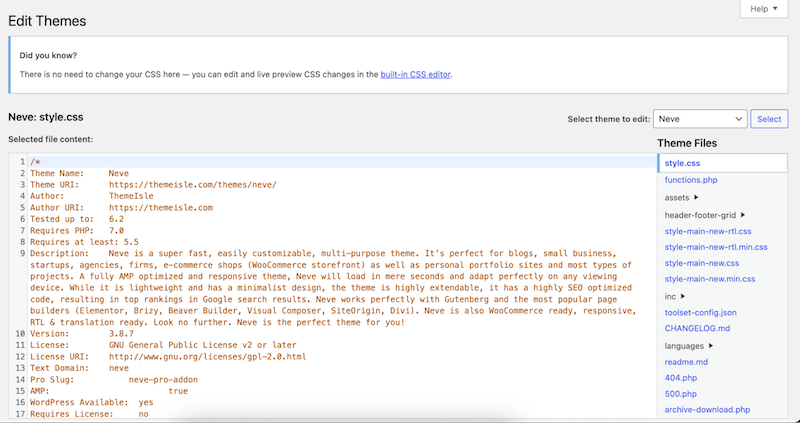
- Here, you can find the various theme files available for modification. The file implicated in the error message, typically indicated by its filename, can be located within the list of theme files displayed on the right-hand side of the editor.
Common theme files where issues may arise include:
- functions.php: Responsible for defining functions and modifying core features of the theme.
- header.php: Controls the header section of the website.
- footer.php: Governs the footer section of the website.
- index.php: Serves as the default template file for displaying content.
When reviewing code within the theme editor, exercise caution and diligence. It is advisable to:
- Be mindful of parent themes: If your website utilizes a child theme, refrain from directly editing the parent theme files. Editing parent theme files directly can lead to complications and potential loss of modifications during theme updates. Instead, focus on modifying the child theme files to ensure compatibility and preserve customizations.
- Consider utilizing child themes (if you don’t already): Child themes offer a safeguard against inadvertent loss of modifications. Any customizations made to theme files with child themes are preserved even after updates to the parent theme. This mitigates the risk of compatibility issues and facilitates seamless maintenance of your website’s design and functionality.
P.S. If the thought of tweaking your website’s code sends shivers down your spine, don’t hesitate to seek out a professional. Alternatively, consider trialing the changes in a test environment before rolling them out to your live site.
Using an FTP/SFTP Client
This is definitely the preferred method over editing files directly from within the WordPress admin dashboard.
Utilizing an FTP/SFTP client, such as FileZilla, provides a robust method for remotely accessing and editing site files, offering greater control and flexibility in resolving the ‘Cannot modify header information’ error. Here’s a systematic guide on how to navigate this process effectively:
- Download and install an FTP/SFTP client, such as FileZilla, onto your local machine. These clients facilitate secure file transfer between your computer and the web server hosting your WordPress site.
- Launch the FTP/SFTP client and enter the requisite connection details, including the hostname, username, password, and port number provided by your web hosting provider. Once authenticated, establish a connection to your website’s server.
- You will be presented with a directory structure representing your website’s file system. Locate the directory housing the theme files, typically located within the wp-content/themes/ directory.
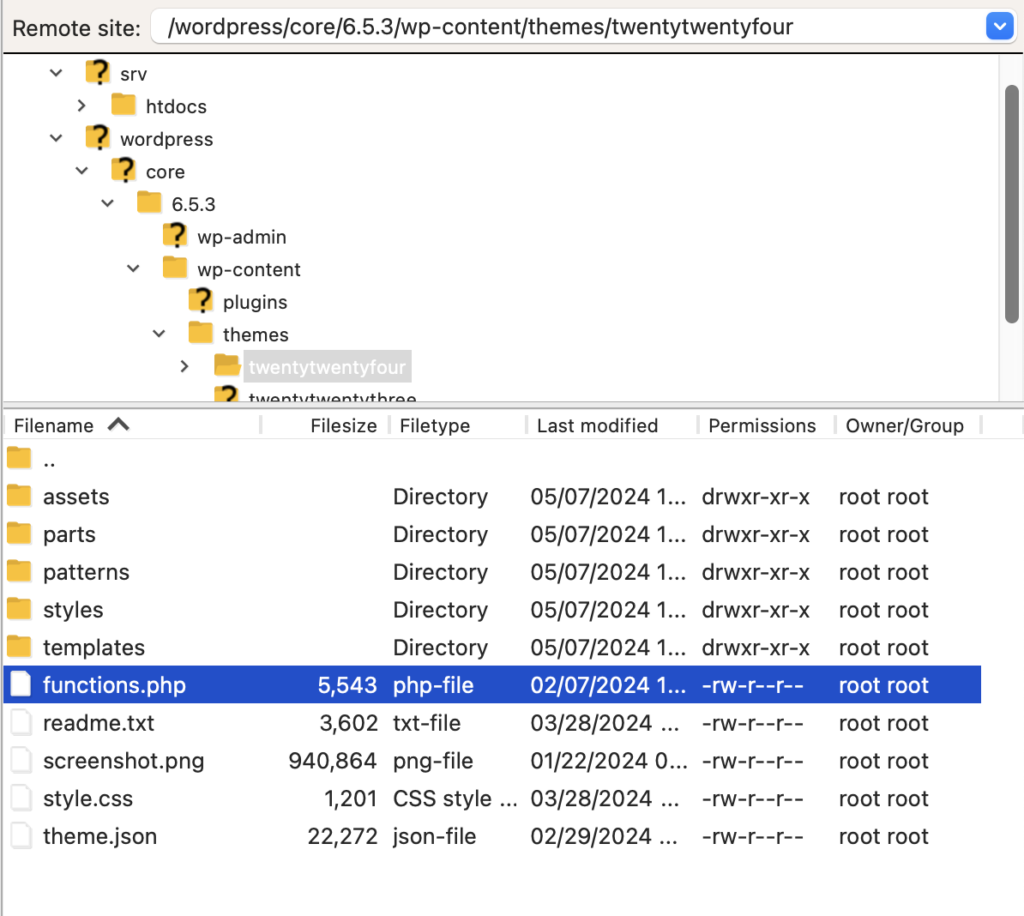
- Identify the specific PHP file(s) implicated in the ‘Cannot modify header information’ error. These files are often referenced in the error message itself. Once identified, select the file(s) and download them to your local machine for editing.
- Open the downloaded PHP file(s) using a text editor of your choice, such as Notepad++ or Sublime Text. Review the code within the file and identify any discrepancies or errors contributing to the header error. Make the necessary modifications to rectify the issue, ensuring to maintain the original file structure and encoding to prevent further errors.
- Save the changes to the PHP file(s) on your local machine. Return to the FTP/SFTP client and upload the edited file(s) back to the corresponding directory on your website’s server, overwriting the existing file(s) if prompted.
Detecting Malicious Code
In certain instances, the presence of malicious or rogue PHP code within your WordPress site can manifest as unexpected text output, potentially leading to the ‘Cannot modify header information’ error. Malicious hackers may exploit vulnerabilities in your site’s codebase to inject nefarious scripts, compromising its integrity and functionality.
Shield Security PRO offers a robust solution to combat such threats through its AI-powered malware scanning feature. This sophisticated tool meticulously analyzes your website’s files and directories, identifying any suspicious code indicative of malicious activity.
Shield Security PRO leverages advanced algorithms and machine learning capabilities to accurately detect and isolate malicious code.
Once detected, its malware scanning feature facilitates prompt and efficient remediation of the identified issues. You can set it to either simply alert you so you can manually remove the malicious code yourself, or you can set it to automatically replace the affected file with a clean version of the original WordPress file. However, this automatic process may remove legitimate changes as well – so use this approach with caution.
Caring for your site proactively with Shield Security PRO
Managing the ‘Cannot modify header information’ error requires strategic intervention. Throughout this article, we’ve explored the intricacies of this error and outlined effective methods for its resolution. This allows you to make the most of your HTML headers while keeping your website functional.
With Shield Security PRO’s malware scanning and repair features, users can detect and eliminate rogue PHP code responsible for header information errors, bolstering their website’s resilience against cyber threats at the same time.
Empower your website with robust protection and elevate your online presence with confidence. Get started with Shield Security PRO and safeguard your WordPress site against threats!